How it works
When a configured alert fires, Canvas automatically starts an investigation and analyzes the data to identify what changed and why.Finding your investigations
Auto-investigations appear in Canvas alongside your other investigations, and work the same way: you can continue the investigation interactively, share it with your team, or use it as a starting point for further analysis. Honeycomb sends successive auto-investigated alerts for a trigger, burn alert, or anomaly to the same Canvas investigation. The Canvas agent will use information from earlier investigations of that alert to speed research and improve accuracy. Up to 30 alerts are investigated by the same agent, for up to a week, before a new Canvas investigation is created.Note: If an auto-investigated trigger, burn alert, or anomaly fires again while the Canvas Agent is still investigating the preceding alert, the new alert is not investigated by the agent. The agent will bring its investigation to conclusion without interruption, ignoring the repeat during the investigation.
Accessing investigations from alerts
When an auto-investigation completes, the alert notification includes an Investigate link so your team can jump straight into the findings in Canvas without having to start an investigation manually.Limits
You can configure automatic investigations for up to:- 25 triggers
- 25 SLO burn alerts
- 25 anomaly detections
Requirements
Auto-investigations require that you enable Honeycomb Intelligence for your team.Connector access
Connectors need your account, so the Canvas Agent has no access to them during an auto-investigation. The Canvas Agent works only with your Honeycomb telemetry.Configuring auto-investigations
Auto-investigations are configured individually on each trigger, SLO, and anomaly detection, not globally. Enable them on the specific resources where you want Canvas to investigate automatically when an alert fires.Triggers
Enabling auto-investigations on a trigger means Canvas starts investigating the moment that trigger fires, giving your on-call team immediate context alongside the alert. To enable Canvas to start automatic investigations for a trigger:- Select Triggers () from the navigation menu.
- Select the name of the trigger you want to configure, or select New Trigger to create a new one.
- Locate the Alerts section.
- Enable the Automatic Investigation toggle.
- Select Save Trigger to save changes.
Service Level Objectives (SLOs)
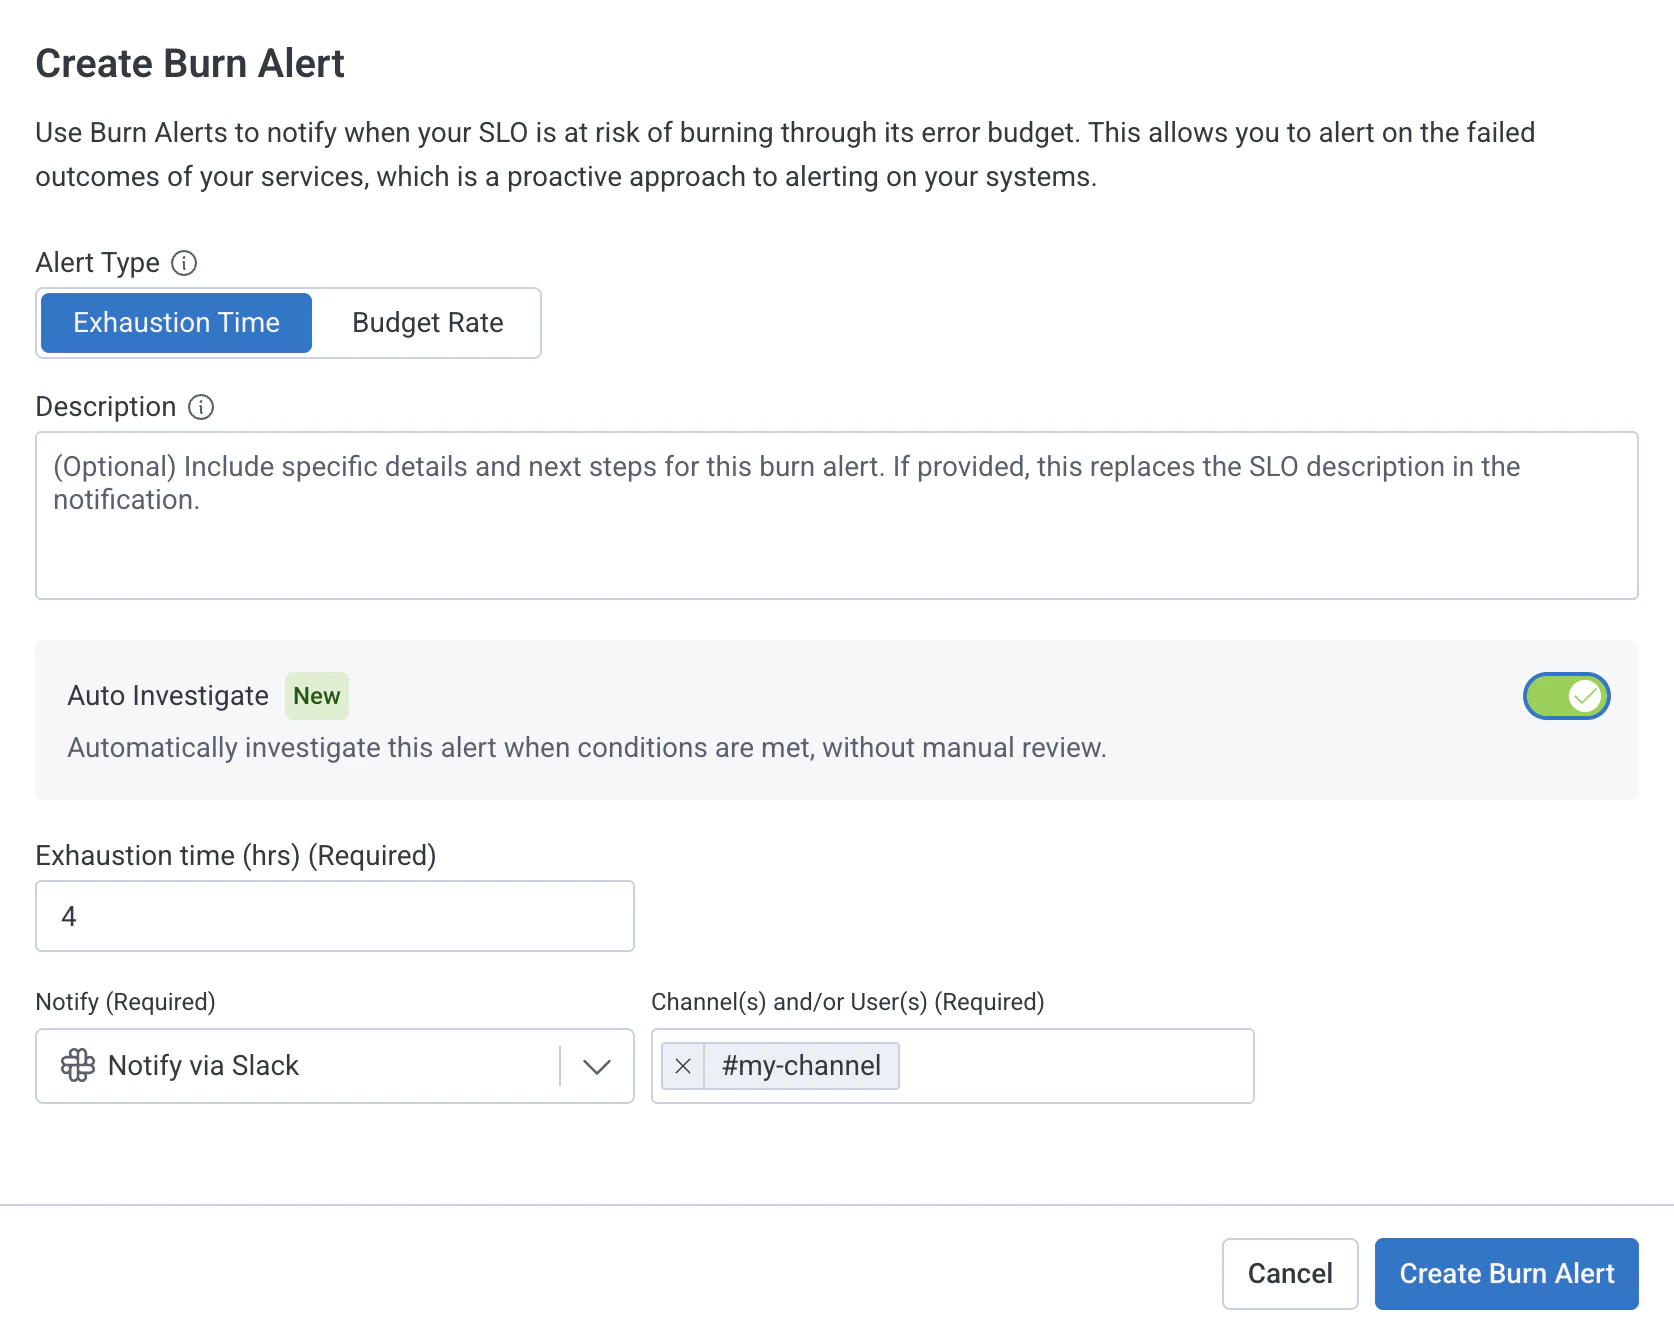
Enabling auto-investigations on an SLO burn alert means Canvas investigates when budget consumption exceeds your threshold, so your team understands what’s driving the burn before they start troubleshooting. To enable Canvas to start automatic investigations for an SLO:- Select SLOs () from the navigation menu.
- Select the name of the SLO you want to configure, or select New SLO to create a new one.
- Select Configure Burn Alerts.
- Select Edit for an existing burn alert, or select New Burn Alert to create a new one.
- Enable the Automatic Investigation toggle.
- Select Update Burn Alert to save changes.
Anomaly detections
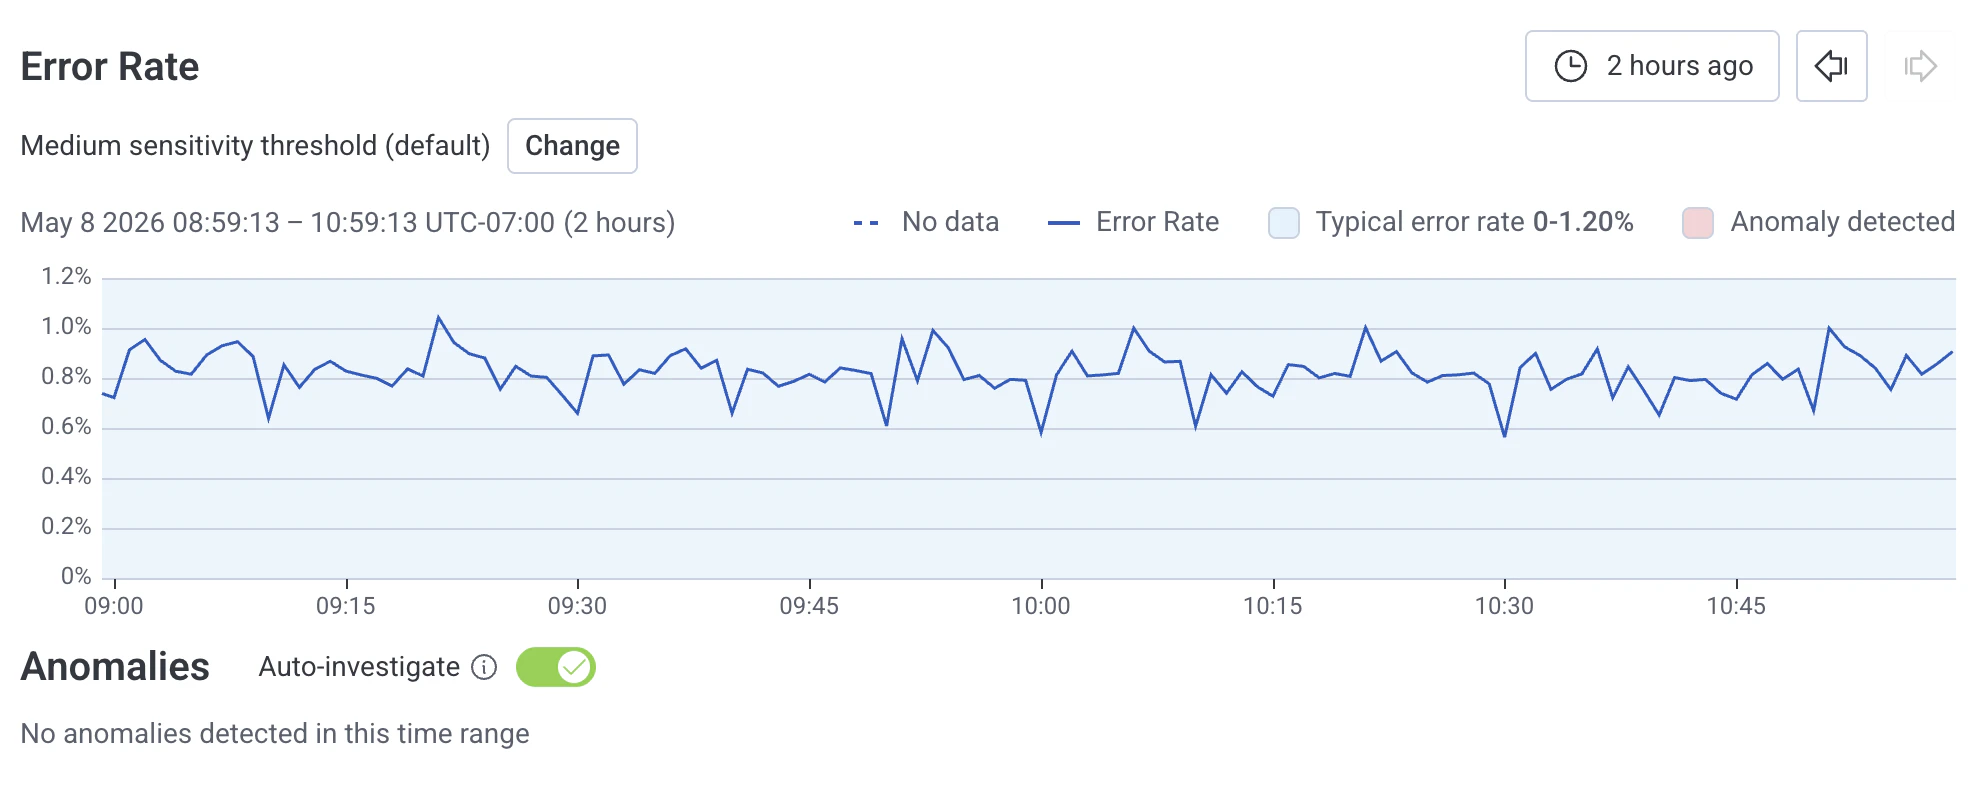
Enabling auto-investigations on an anomaly means Canvas starts investigating as soon as that anomaly is detected, so your team has findings waiting before they even open Honeycomb. To enable Canvas to start automatic investigations for an anomaly:- Select Anomalies () from the navigation menu.
- Select the name of the anomaly you want to configure.
- Locate the Anomalies section.
- Enable the Auto-investigate toggle.