AWS PrivateLink allows you to create a private connection to Honeycomb’s API over AWS networks.
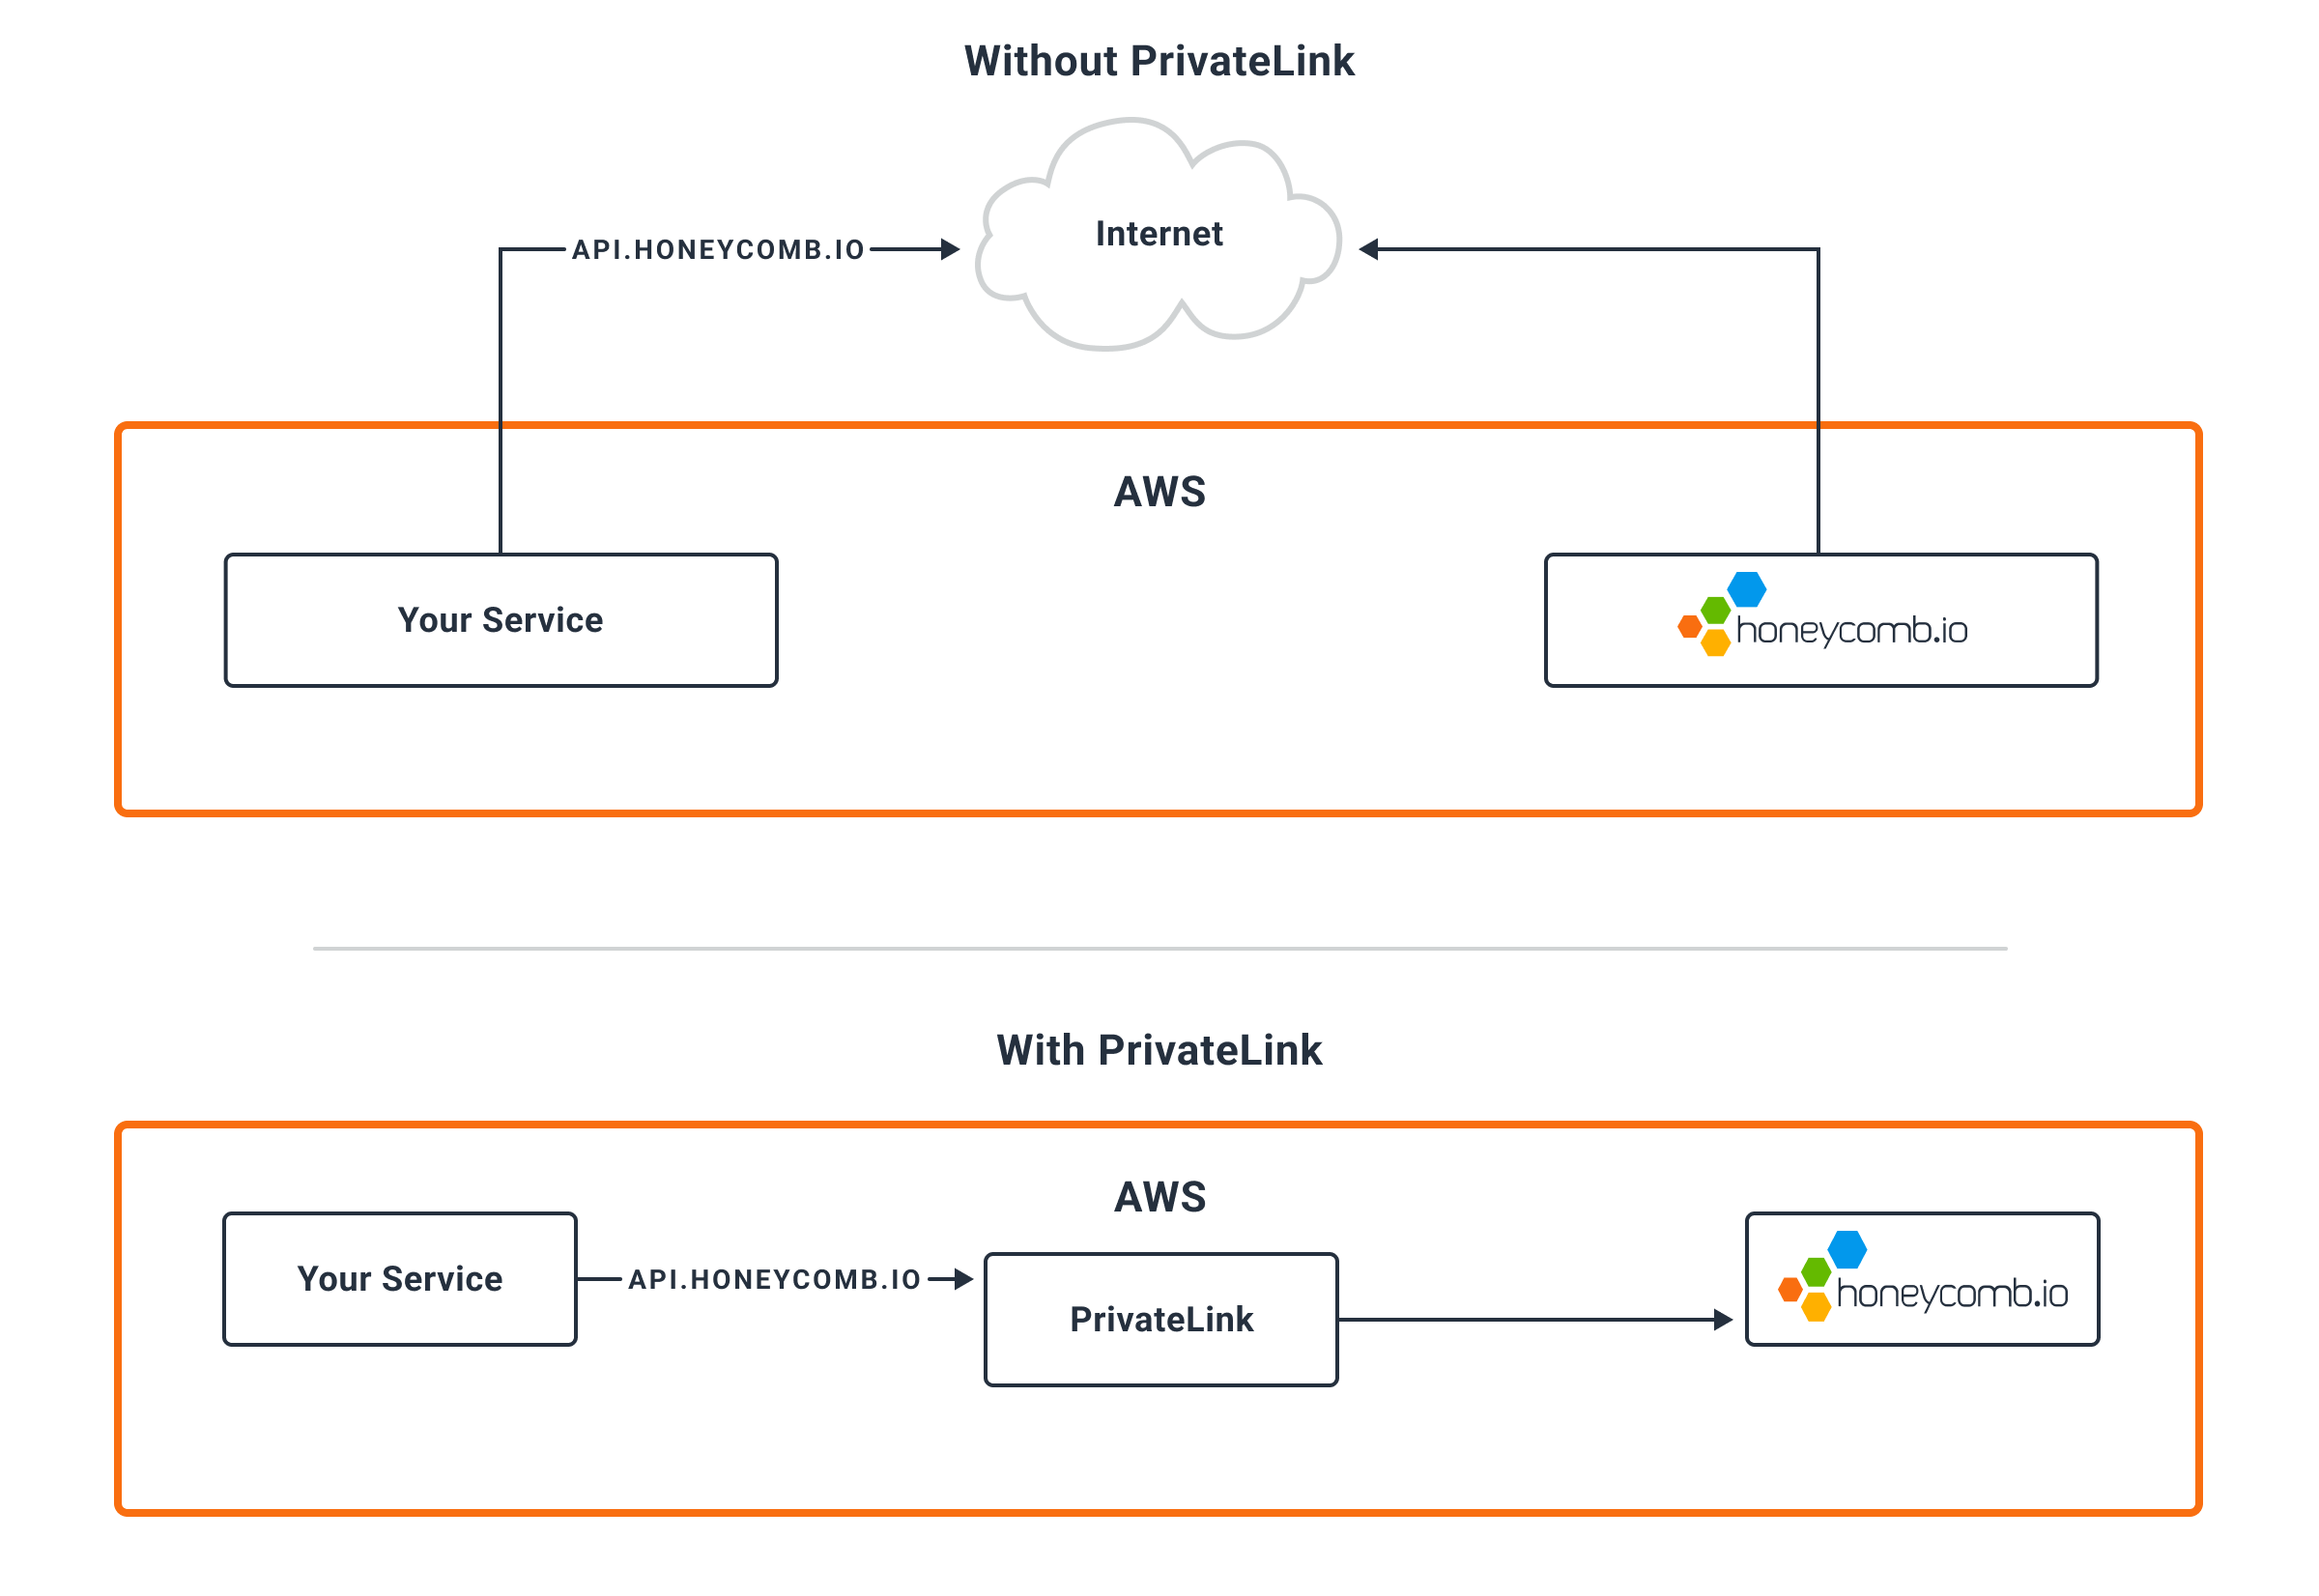
This has the following advantages:
Honeycomb must grant access to each AWS account that requires access to the Honeycomb API via AWS PrivateLink. Contact your Honeycomb account team for details.
Honeycomb offers AWS PrivateLink to our US instance from the us-east-1 region and to our EU instance from the eu-west-1 region.
VPCs within each region may access it directly, while outside VPCs can use VPC Peering.
These instructions configure AWS PrivateLink via the AWS Console.
Configuration of AWS PrivateLink through infrastructure-as-code tools like Terraform or CloudFormation is recommended but not shown. See the Terraform example below.
us-east-1eu-west-1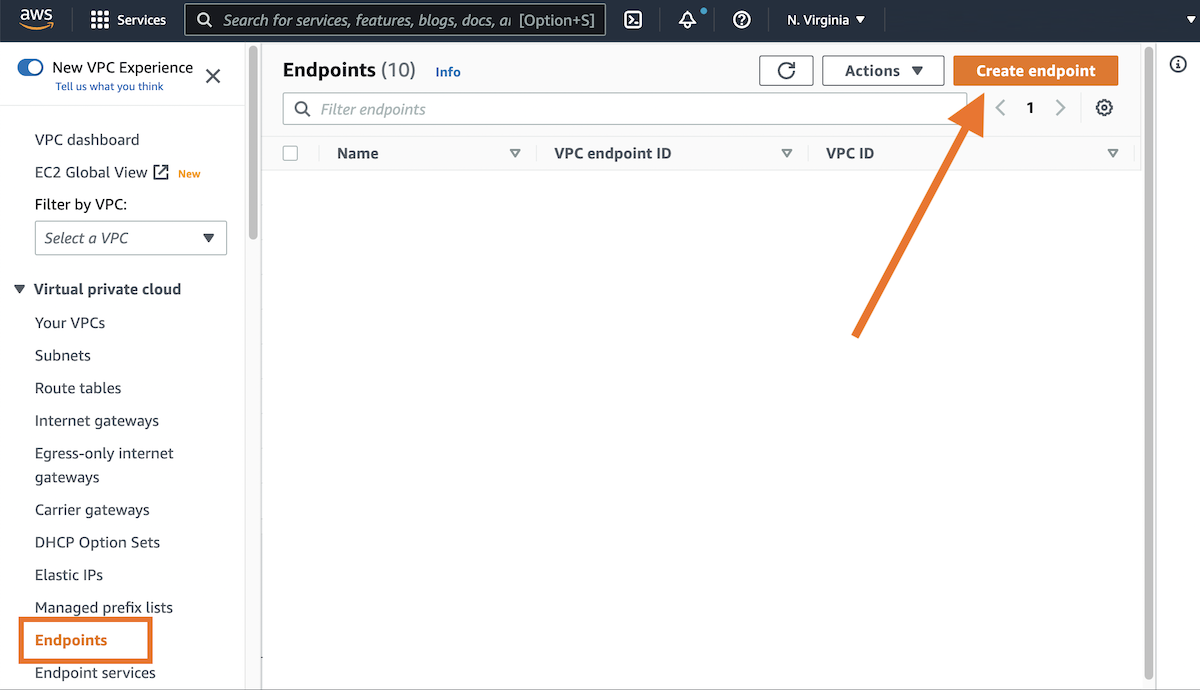
com.amazonaws.vpce.us-east-1.vpce-svc-0878e9afcbb4c4333com.amazonaws.vpce.eu-west-1.vpce-svc-077ead63dd7ebe330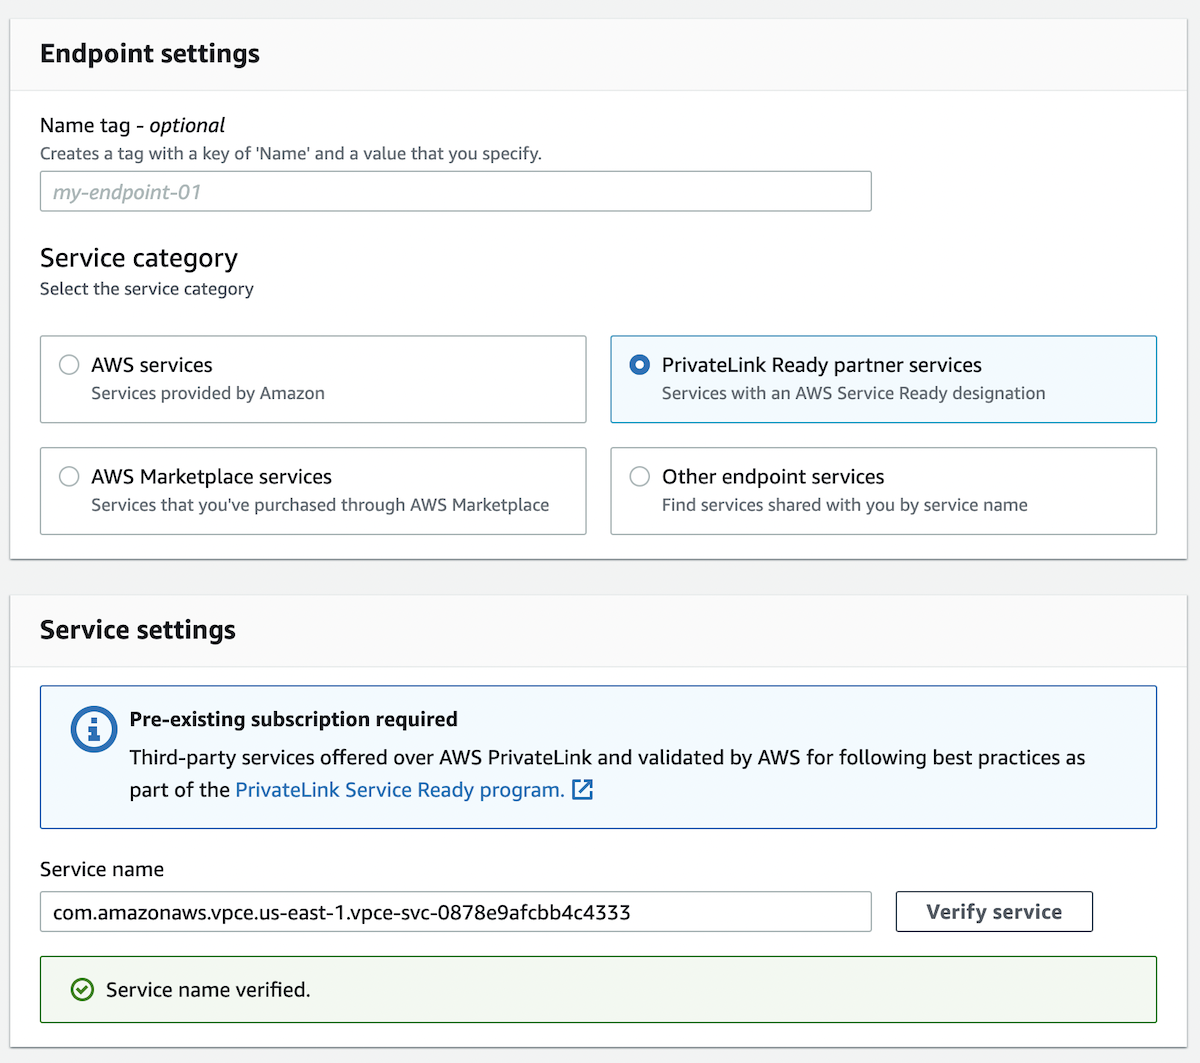 If the service fails to validate, reach out to your Honeycomb account team.

443 from your VPC’s network block, such as 10.0.0.0/8.
If you do not see a security group, you may need to create one.Refer to the AWS documentation on Interface Endpoints for more details about endpoint configuration.
resource "aws_vpc_endpoint" "honeycomb" {
  vpc_id            = aws_vpc.main.id
  service_name      = "com.amazonaws.vpce.us-east-1.vpce-svc-0878e9afcbb4c4333"
  vpc_endpoint_type = "Interface"

  subnet_ids         = data.aws_subnets.private.ids

  security_group_ids = [
    aws_security_group.honeycomb_private_endpoint.id,
  ]

  private_dns_enabled = true
}

data "aws_subnets" "private" {
  filter {
    name   = "vpc-id"
    values = [aws_vpc.main.id]
  }
}

resource "aws_security_group" "honeycomb_private_endpoint" {
  name        = "honeycomb_private_endpoint"
  description = "Traffic to Honeycomb endpoint"
  vpc_id      = aws_vpc.main.id

  ingress {
    description      = "TLS from VPC"
    from_port        = 443
    to_port          = 443
    protocol         = "tcp"
    cidr_blocks      = [aws_vpc.main.cidr_block]
    ipv6_cidr_blocks = [aws_vpc.main.ipv6_cidr_block]
  }

  egress {
    from_port        = 0
    to_port          = 0
    protocol         = "-1"
    cidr_blocks      = ["0.0.0.0/0"]
    ipv6_cidr_blocks = ["::/0"]
  }

  tags = {
    Name = "honeycomb_private_endpoint"
  }
}
AWS captures metrics for each VPC endpoint. These metrics are accessible through the AWS Console and published to CloudWatch. Learn how to send AWS CloudWatch metrics to Honeycomb.
From the AWS Console:
us-east-1eu-west-1