Track and organize data for distinct use cases with Boards.
This documentation reflects the Flexible Boards experience.
Learn more about migrating existing legacy Boards to Flexible Boards.
A Board is a workspace where you can save, organize, and share analysis components focused on a common objective. It’s designed to help you efficiently monitor data, investigate issues, and collaborate with your team.
With Boards, you can:
Boards let you collect data from multiple sources and customize how it’s presented.
A Board can contain multiple panels, each displaying different types of data. Types of panels include:
When you open a Board, panels automatically refresh to show the latest data.
To help you get started quickly, we offer pre-configured Board Templates for common use cases. Templates let you jump straight to analysis, saving you time that would otherwise be spent building Boards manually. To explore available templates, visit Using Board Templates.
Whether you start with a template or create a Board yourself, all Boards are fully customizable.
Any team member can create a Board. By default, Boards are public, meaning everyone on your Honeycomb Team can access and edit them.
Boards can also be restricted to the creator or a specific group of Team members. When restricted, only those added as collaborators can add or edit panels. Team owners always have access to Boards, regardless of restrictions.
To learn more about Board access and permissions, visit Managing Team Permissions.
Create a Board to organize related queries and SLOs, making them easier to access. For example, you can use a Board to monitor a specific service, or gather queries for a particular investigation.
You can create a Board from a pre-configured template to quickly gain insights with minimal effort and ensure a consistent approach to collaboration. Customize these templates to fit your needs or use them as-is.
To create a Board from a template:
Select Boards (![]() ) from the navigation menu.
) from the navigation menu.
Go to the Templates view, or select Create Boards and From Template.
Choose a template to preview with your data.
In the template preview, review the data displayed in the query panels.
If some queries aren’t displaying correctly, you may need to map required fields to your data:
Go to the Setup view.
Find any queries marked Unable to display.
In the Required fields column, select the target field, then choose the appropriate replacement field.
Repeat this process for any additional fields or queries.
Select Use Template.
Your new Board appears on the Boards page. Any queries marked as unable to display during creation are not included.
Creating a Board manually gives you complete control over how you organize and visualize your data. This approach is ideal when you have specific monitoring or investigation needs that aren’t covered by existing templates.
To create a Board manually:
Select Query (![]() ) from the navigation menu.
) from the navigation menu.
Select Save query, and then choose Board.
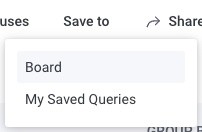
In the modal, select New board, and enter details:
| Field | Description |
|---|---|
| Query name | Name that will appear on the Board. If the query has been saved to a board previously, this field will auto-fill for editing. |
| Query description | Description of the query that will appear on the Board. If this query has been saved to a board previously, this field will auto-fill for editing. Supports basic markdown formatting, including links. |
| Board name | Name of the new Board. Choose a name that clearly reflects the Board’s purpose. |
| Board description | Description of the new Board. Supports basic markdown formatting, including links. |
| Sharing | Specifies who has access to the Board. Team restricts to your Honeycomb team. Restricted restricts to selected collaborators and team owners. You can adjust collaborators when you share a Board. |
| Tags | A set of key:value pairs for organizing the Board. Useful for filtering. |
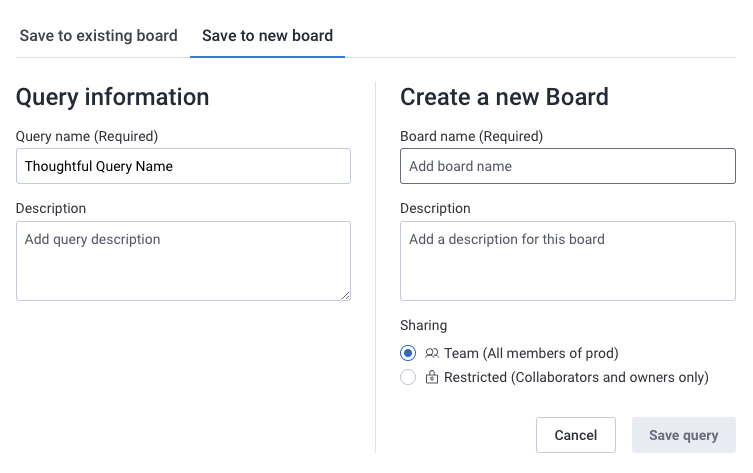
Select Save query.
Select Boards (![]() ) from the navigation menu.
) from the navigation menu.
Select Create Board and select Blank board.
In the modal, enter details:
| Field | Description |
|---|---|
| Name | Name of the new Board. Choose a name that clearly reflects the Board’s purpose. |
| Description | Description of the new Board. Enter a description that helps others understand its purpose and how to use it. Supports basic markdown formatting, including links. |
| Sharing | Specifies who has access to the Board. Team restricts to your Honeycomb team. Restricted restricts to selected collaborators and team owners. You can adjust collaborators when you share a Board. |
| Tags | A set of key:value pairs for organizing the Board. Useful for filtering. |
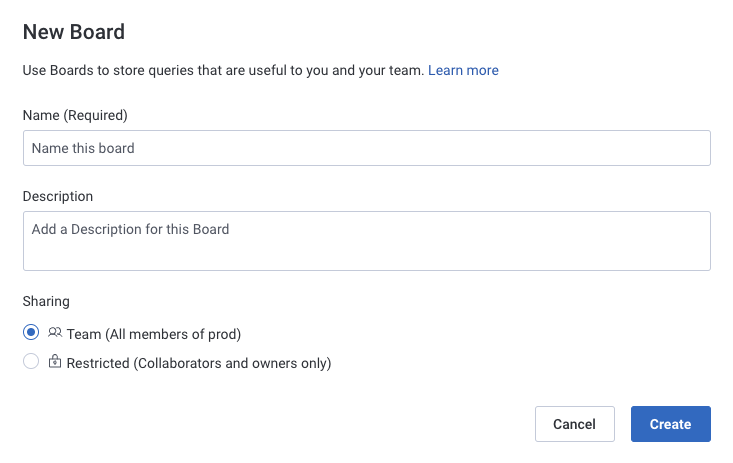
Select Create.
Duplicate a Board to preserve its structure while adapting it for a new project or making experimental changes. It’s a useful way to create a backup or repurpose an existing Board.
To duplicate a Board:
Select Boards (![]() ) from the navigation menu.
) from the navigation menu.
Select the Board you want to duplicate.
On the Board’s details page, select the Settings icon ( ), then choose Duplicate.
In the modal, enter details:
| Field | Description |
|---|---|
| Title | Name of the new Board. The default name will be “Duplicate of” followed by the original Board’s name, but you can edit it to reflect the new Board’s purpose. |
| Environment | Specifies the environment to which you want to copy the Board. To successfully duplicate a Board, both environments must have matching schema sets. Only queries with dataset and field names that match the destination environment will be copied; incompatible queries will be omitted. |
Select Create duplicate.
The screen refreshes to display the new Board.
Control which work items remain easily accessible and visible within your workspace.
Organize and easily revisit important queries without having to recreate them. Once added, selecting a query from the Board opens the Query Results page, where you can perform the same analysis and access all the same features as you would directly from the page.
To add a query:
Select Query (![]() ) from the navigation menu.
) from the navigation menu.
Select Save query, and then choose Board.
In the modal, select the appropriate board type, and enter details:
| Field | Description |
|---|---|
| Query name | Name that will appear on the Board. If the query has been added to a board previously, this field will auto-fill for editing. |
| Query description | Description of the query that will appear on the Board. If this query has been added to a board previously, this field will auto-fill for editing. Supports basic markdown formatting, including links. |
| Existing board | Select the Board to which you want to add the query. |
| Field | Description |
|---|---|
| Query name | Name that will appear on the Board. If the query has been added to a board previously, this field will auto-fill for editing. |
| Query description | Description of the query that will appear on the Board. If this query has been added to a board previously, this field will auto-fill for editing. Supports basic markdown formatting, including links. |
| Board name | Name of the new Board. Choose a name that clearly reflects the Board’s purpose. |
| Board description | Description of the new Board. Supports basic markdown formatting, including links. |
| Sharing | Specifies who has access to the Board. Team restricts to your Honeycomb team. Restricted restricts to collaborators and owners only. |
Select Save query.
Select Boards (![]() ) from the navigation menu.
) from the navigation menu.
Select the Board to which you want to add a query.
From the Board’s details page, select the Add icon (![]() ).
).
Select Add Query.
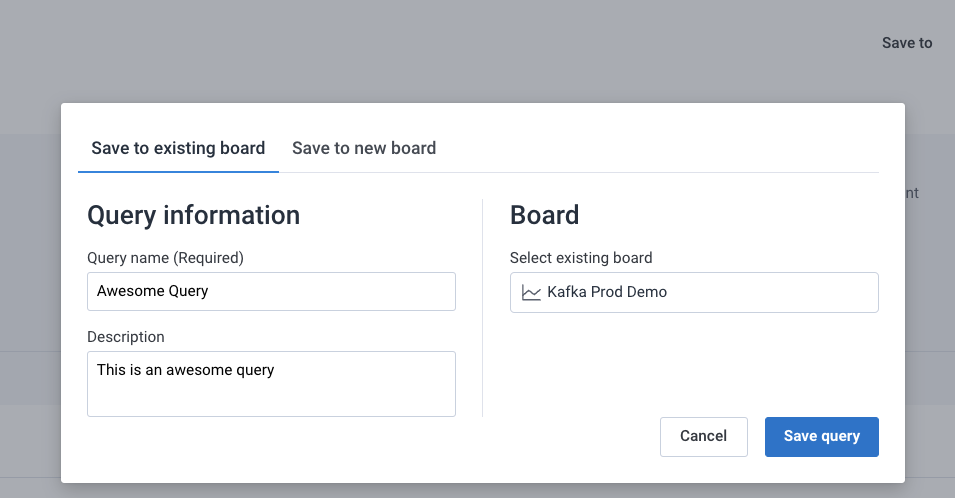
In the modal, select Existing board, and enter details:
| Field | Description |
|---|---|
| Query name | Name that will appear on the Board. If the query has been saved to a Board before, this field will auto-fill for editing. |
| Query description | Description of the query that will appear on the Board. Supports basic markdown formatting, including links. If this query has been saved to a Board before, this field will auto-fill for editing. |
| Existing board | Board to which you want to add the query. This field should be pre-populated with your selected Board. |
Select Save query.
The page refreshes, and the Board updates to reflect your new query.
Keep key performance indicators and related queries in one place for streamlined monitoring. Group SLOs with their corresponding queries to quickly assess service performance, identify issues, and ensure reliability targets are met.
To add an SLO:
Select SLOs (![]() ) from the navigation menu.
) from the navigation menu.
Select the SLO that you want to add to a Board.
From the SLO’s details page, select Manage, then choose Save to Board.
In the modal, select the target Board.
Select Save SLO.
Select Boards (![]() ) from the navigation menu.
) from the navigation menu.
Select the Board to which you want to add an SLO.
From the Board’s details page, select the Add icon (![]() ).
).
In the modal, select the target SLO.
Select Save SLO.
The page refreshes, and the Board updates to reflect your new SLO.
Remove a query to clear outdated or unnecessary visualizations.
To remove a query:
The page refreshes, and the Board updates to reflect your changes.
Remove an SLO to declutter your Board and ensure you are focusing on the most relevant metrics. This is useful when you no longer need to track a particular SLO or want to simplify your board for easier access to critical data.
To remove an SLO:
Page refreshes and the SLO is no longer present.
Interacting with query and SLO panels directly from a Board lets you access detailed insights and perform familiar actions without leaving your workspace.
Interacting with a query from a Board gives you direct access to detailed query results, so you can monitor performance and dig deeper into data without switching pages.
From a Board, you can perform familiar query actions, such as:
For more detailed insights, you can quickly navigate to the full query details and data views.
To access full query details:
Interacting with an SLO from a Board provides an at-a-glance view of your service’s compliance and burn rate, helping you quickly assess service health and performance. For more in-depth analysis, you can quickly navigate to the full SLO details at any time.
To access full SLO details:
Easily share a Board with others, for quick access to content without needing to manually invite collaborators. This is ideal for sharing board details with teammates or stakeholders who need to view the board but not necessarily modify it.
To learn more about changing Board access, visit Customize Boards: Changing Access.
If a Board is no longer needed, delete it to remove it from your workspace.
To delete a Board:
The page refreshes to reflect the deletion.