

Creating Triggers
You can create a trigger within the Triggers page or while using the Query Builder. You can create a trigger for a specific dataset or across all datasets in your environment (an environment-wide trigger). Environment-wide triggers are useful when you need to alert on conditions that span across multiple services or datasets within your environment.- Triggers
- Query Builder
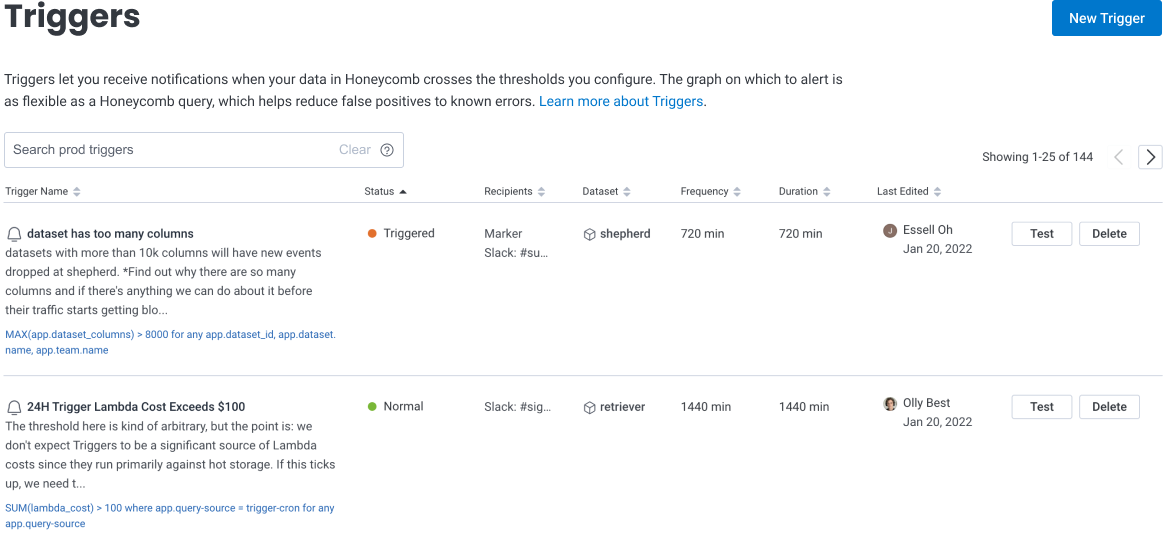
- Select Triggers () from the navigation menu.
- Select New Trigger in the top right corner. If no previous triggers exist, select Create Your First Trigger instead.
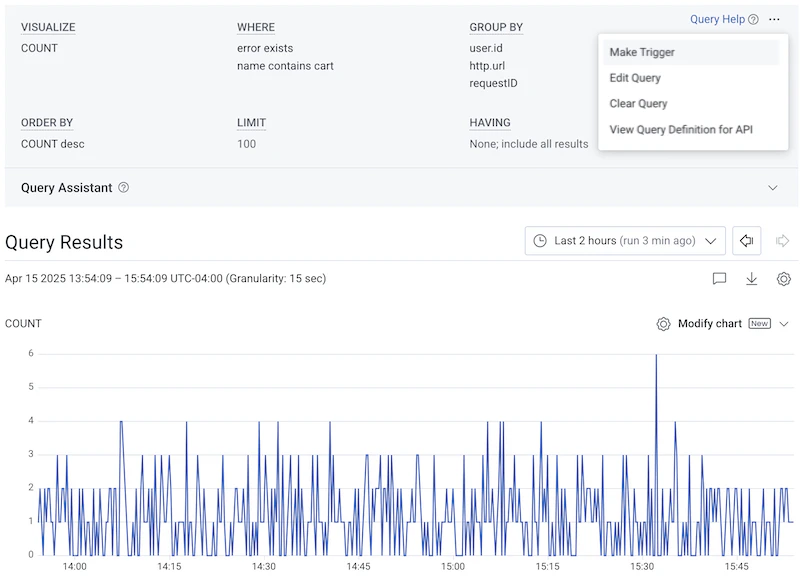
- Choose your Dataset for the trigger and select Make Trigger. You can select an individual dataset or choose All Datasets to create an environment-wide trigger.
You cannot create a trigger on a heatmap or a concurrency calculation.
Learn more about trigger best practices.
Configuring Triggers
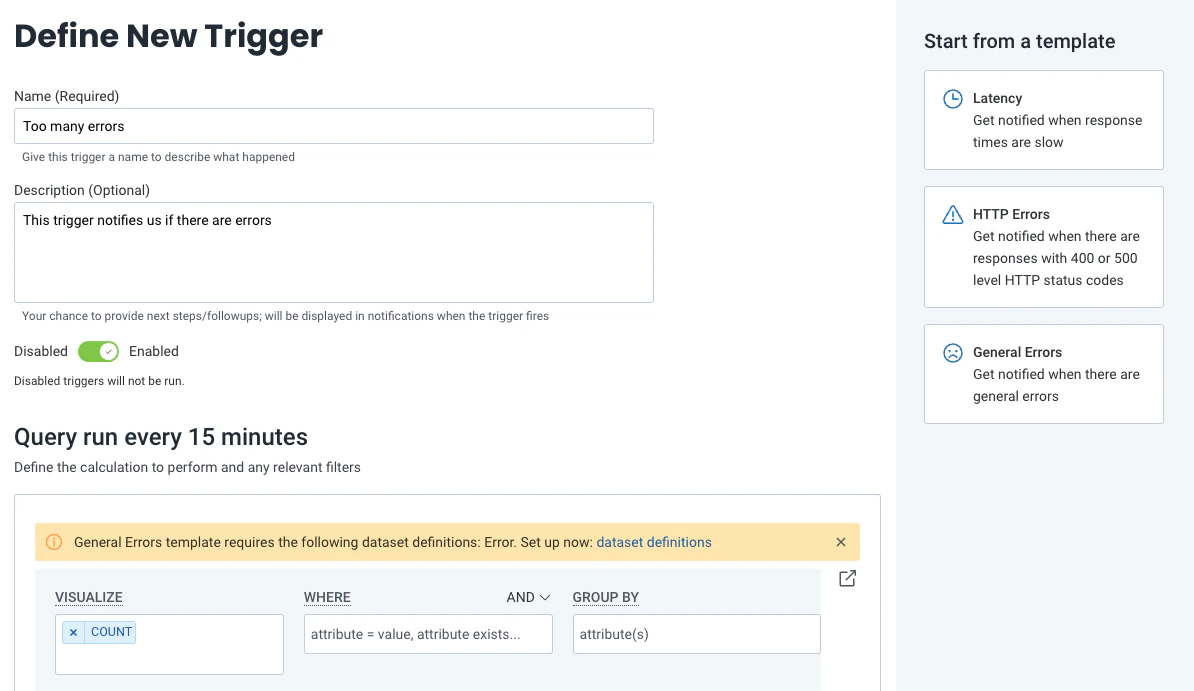
To configure the trigger, define the trigger details, trigger alert threshold, and notification preferences in the Define New Trigger page that appears.Define New Trigger
Enter identifying information for your Trigger:| Field | Description |
|---|---|
| Name | (required) Used in notifications about the trigger. Ensure the name describes clearly what has happened. |
| Description | (optional) Used in notifications about the trigger. Recommended use: indicate next steps or include links back to documentation, so alert receiver will know how to respond. |
| Tags | Labels that organize and group related Triggers, making it easier to filter by tag and find them. Enter tags in key:value format (for example, area:pipelines or team:prism). Use Assign to add up to 10 tags per Trigger. Tag keys can contain letters only, up to 32 characters. Tag values can include alphanumeric characters and the special characters / and -, with a maximum length of 128 characters. |
| Enabled | Determines whether Trigger is active. Toggle to enable [on] or disable [off]. |
Trigger Query
After defining your Trigger information, the next Query Run section displays your Trigger Query. A Trigger Query scopes the conditions for your Trigger threshold. If you created a new Trigger from Query Builder, your Trigger Query automatically populates and the sample graph appears automatically. If you created a new Trigger from the Triggers page, you must enter a Trigger Query before the sample graph appears. Create a Trigger Query using SELECT, WHERE, GROUP BY, and HAVING clauses. Use the Run in Query Builder icon () to the right of the available clauses to open your Trigger Query in Query Builder in a new tab. For inspiration on trigger queries, visit our Trigger Examples. A Trigger query must contain one statement. If your query has multiple statements, you can add a formula to evaluate those statements into a single value.HAVING clause
Use a HAVING clause to filter aggregated results in your Trigger Query. This will allow you to define composite alert conditions, and will only notify when all of those unique conditions are met. This is particularly useful when using GROUP BY on high-cardinality attributes where numerous distinct groups can be generated.Only one HAVING clause can be defined per Trigger Query.
Sample Graph
After entering your trigger query, a sample graph appears, which displays how the trigger query and the trigger alert components interact. The sample graph displays the trends for your query with the most recent 16 periods as indicated by markers. By default, the sample graph’s duration and frequency are both 15 minutes. Navigate to Duration and Frequency in the Alerts section to modify these values and your sample graph will adjust accordingly.Trigger Query Example
In the example below, the sample graph for a 30 minute frequency with a 120 minute duration shows the previous 1920 minutes (or 32 hours).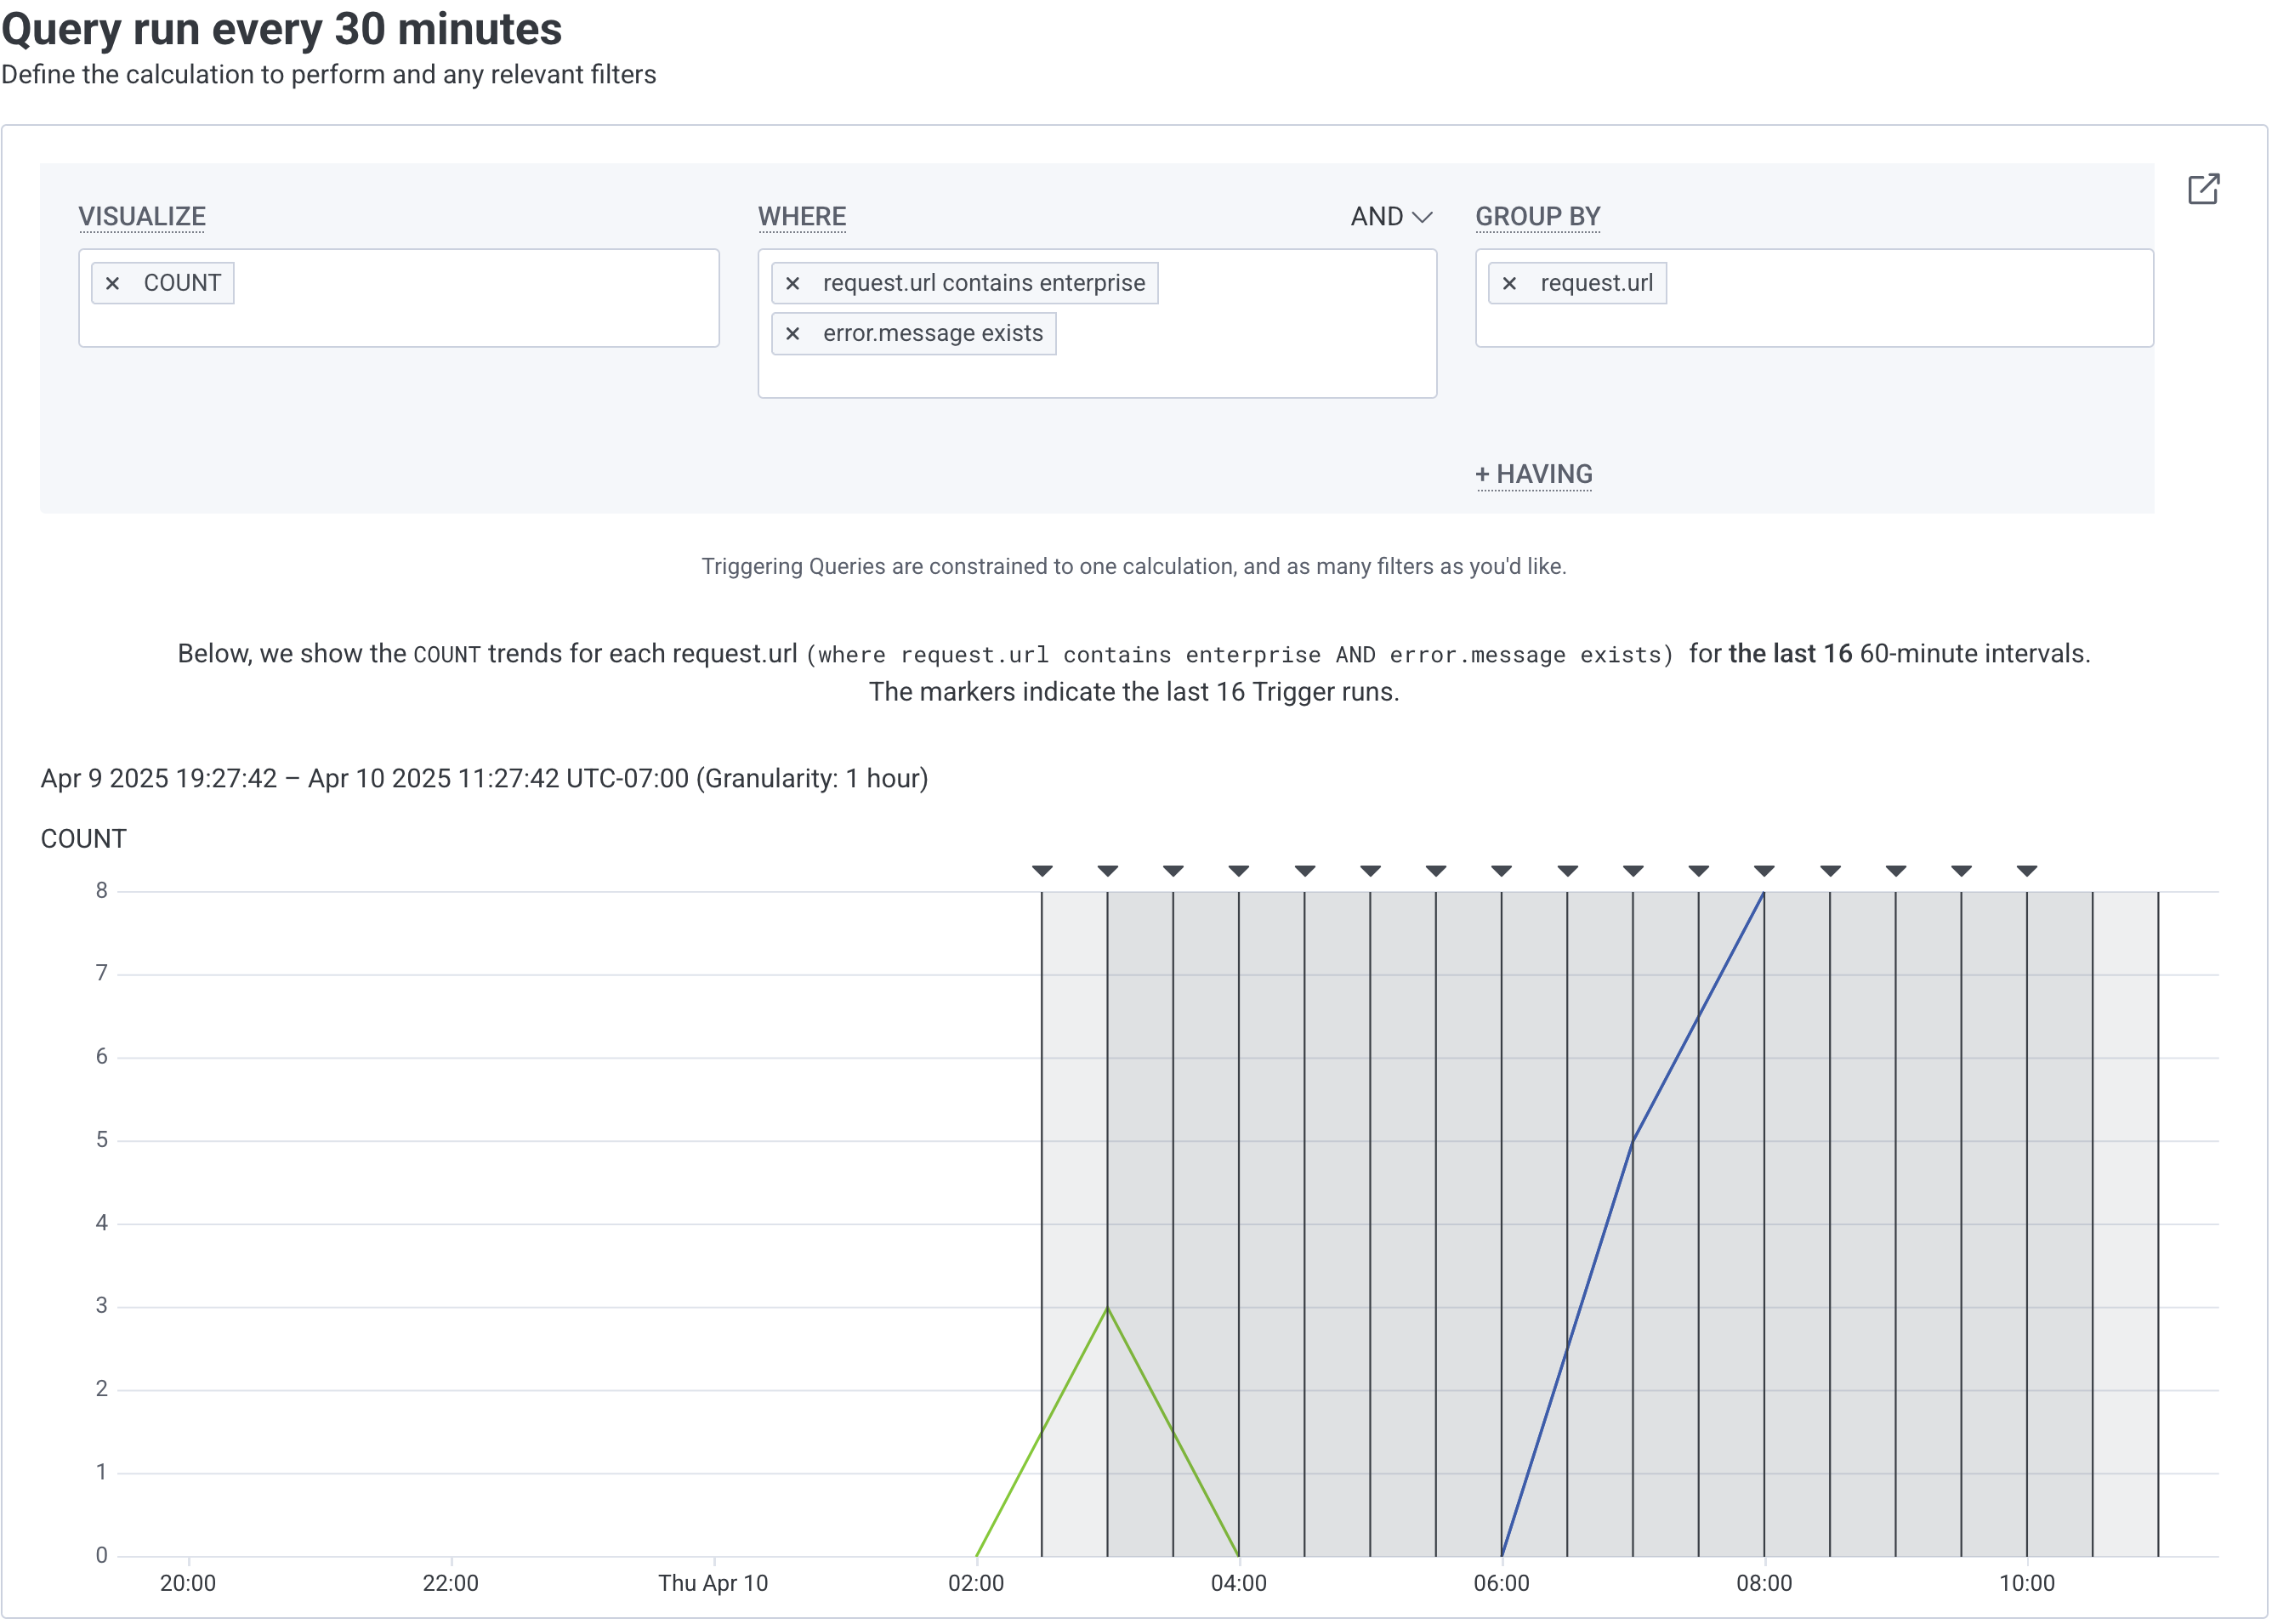
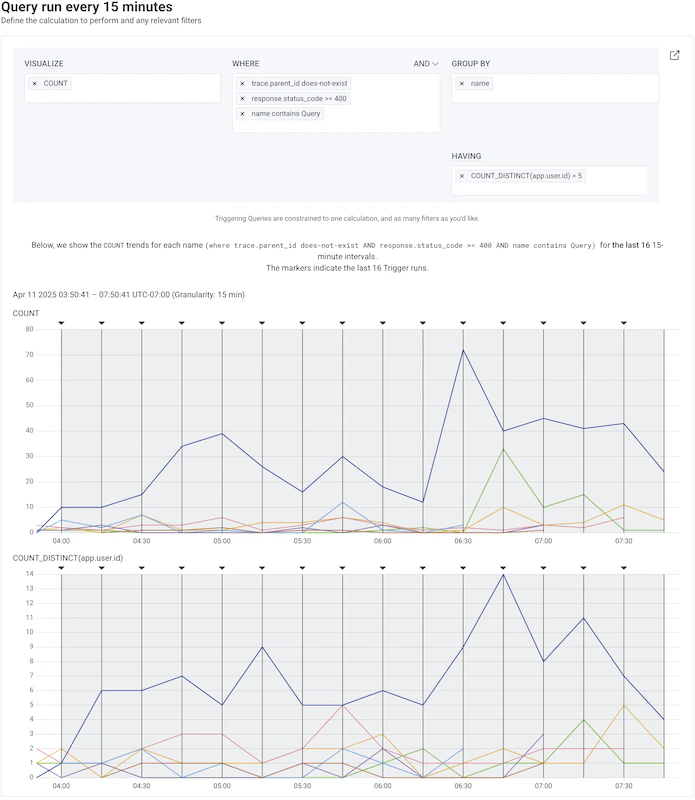
Trigger Query Example with HAVING
In the example below, the top graph shows the results of the Trigger Query and the bottom graph shows the results of applying HAVINGCOUNT_DISTINCT(app.user.id) > 5 to the Trigger Query.
Alerts
Next, define the conditions for the trigger alert notification.Trigger Alert Type
Configure the type of calculation needed to notify. Select the named tab to choose between:- Static Threshold - Use to notify when the condition crosses the specific value of your configured static threshold.
- Dynamic Baseline - Use to notify when a delta, or difference in value, is detected compared to a baseline value in the past. Use cases include Performance Monitoring, such as operational KPIs (traffic volume, error rates) shifts, and Customer Behavior Monitoring, such as drops in activity or spikes in churn.
Threshold
Threshold indicates what trigger condition generates a notification. Enter your notification conditions, depending on your Trigger Alert Type.- Static Threshold
- Dynamic Baseline
-
Compose the condition of your Static Threshold. Your trigger will alert when data meets or crosses this threshold.
- First, determine the numerical value that the trigger should alert upon, based on your Trigger Query. Use Trigger an alert if returned (choose a calculation) is to enter this numerical value.
- Use the dropdown window to select a calculation value:
>(greater than)=>(greater than or equal to)<(less than)<=(less than or equal to)
-
Set the number of times the Threshold, or trigger condition, should be met consecutively before alerting you.
Use Send an alert after the threshold has been met
xtimes to enter this value. This value defaults to1and cannot be greater than5. For example, if the number of times a trigger’s threshold has been met is3before alerting and the trigger’s frequency is5minutes, then this trigger alerts when its threshold has been met for the past 15 minutes, or 3 cycles of5minutes.
Frequency of Alerts
Configure how frequently alerts occur for your trigger. Use the toggle to choose between:- Limited alerts (default) - Receive two alerts: a triggered alert when the threshold is met or exceeds, and a resolved alert when the threshold is unmet.
- Continuous alerts - Receive an alert every time the threshold is met and the trigger runs. For example, if the Trigger’s frequency is set to 5 minutes, you will receive an alert every 5 minutes. No resolution alert is sent.
About Triggered Groups: If you have specified fields in the GROUP BY clause of a trigger, then the trigger will notify all recipients when any new group crosses the trigger threshold.For example, if a trigger is already in a triggered state, and any new group surpasses the trigger threshold, the trigger will again notify all recipients and include the new groups that have triggered the alert.
- To receive alerts when Triggers continue to meet or exceed the threshold
- When the triggered event is more important than receiving a resolved event
Duration
Duration determines what time range of data that the trigger will check. The default Duration value is 15 minutes.The duration of a trigger query can be 1 day at most, and cannot exceed 4 times the frequency of the trigger.
For example, if the trigger’s frequency is 1 hour, then query duration cannot be more than 4 hours.
Duration can also not be less than the trigger’s frequency.
Event Latency Graph
Use the Event History Latency chart to help determine a duration that captures all your events, even if delayed. To expand the chart display, select the downward arrow icon (). This graph describes the maximum and average amount of delay between the timestamp on the event and when it reached Honeycomb. For example, if the average event latency is 2 minutes, and you want to run your trigger every 5 min, then choose a 7 minute duration to ensure that delayed events are captured by the trigger. Please note that if your traces span a long time frame, you may see high latency in this chart, even though the traces are arriving as soon as they complete.Frequency
Frequency determines how often, in minutes, to evaluate for the Threshold, or trigger, condition. The default Frequency value is 15 minutes. Consider what is normal within your frequency window so notifications only capture conditions worth alerting.Dynamic Baseline Triggers requires a minimum Frequency value of 15 minutes.
Trigger frequency must be specified in whole minutes, from
1 to 1440.
Decimal values are truncated to the preceding full minute.
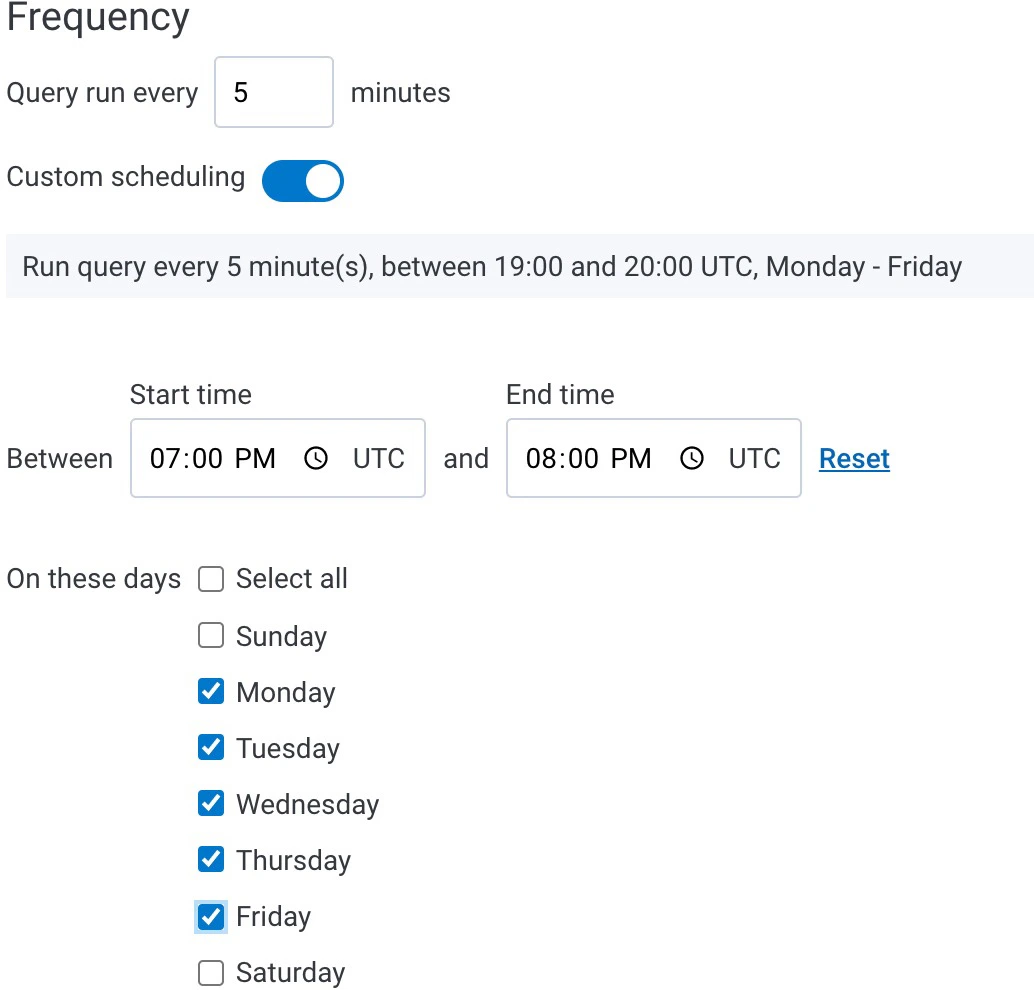
(3.6 becomes 3.)Custom Scheduling Option
Use Custom Scheduling to specify a scheduled window in which the trigger will run. For example, you only need alerts during business hours from Monday through Friday. To enable Custom Scheduling:- Toggle the Custom scheduling toggle to [on].
- Specify the time range and days of the week that the trigger should run.
Note that the start time and end time must be provided in Coordinated Universal Time (UTC).
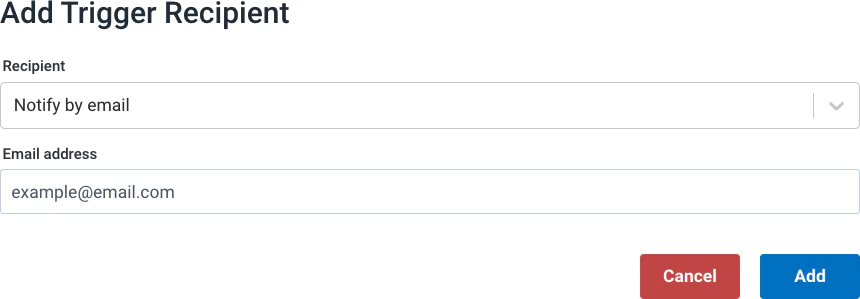
Recipients
The trigger will notify all listed recipients when the measured value crosses the configured threshold. No limitation exists for the number of recipients. By default, Honeycomb will send an alert to recipients once, when the trigger crosses the configured threshold or the Triggered state, and then send a resolved alert once the trigger is back in an OK state. To add a new recipient, select Add Recipient. Use Go to Integration Center to configure additional trigger recipient integration options, like Slack, PagerDuty, Microsoft Teams, and Webhooks.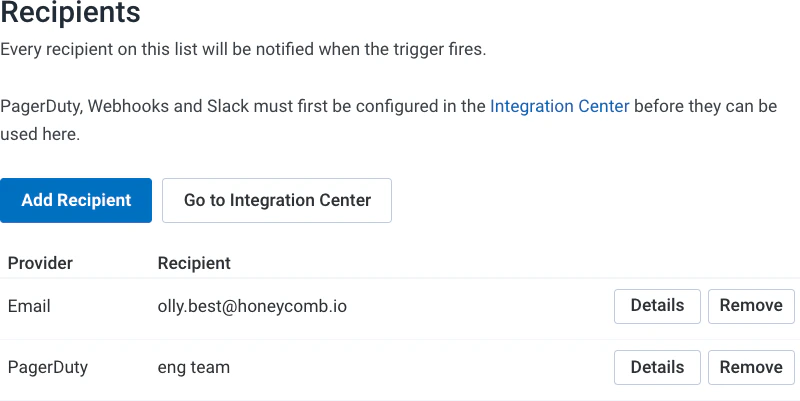
Activate Trigger
Finally, select Create Trigger to save your trigger configuration. Once saved, the trigger is immediately active and will run at the next frequency interval, such as on the next 5 minute interval for a 5 minute frequency. You can enable or disable a trigger by editing the trigger and selecting the Enabled toggle.Start from a Template
You can create a Trigger from a template. Trigger Templates are visible in the right sidebar when creating a new Trigger. Selecting a template populates the Name, Description, and Query in the Trigger form.Trigger Templates are only available when creating a trigger for a specific dataset. Environment-wide triggers do not support templates.
Available Trigger Templates
| Template | Trigger Name | Trigger Description | Dataset Definitions Required |
|---|---|---|---|
| Latency | Latency is too high | This trigger notifies us if the average duration of root spans is higher than 500ms over the last 15 minutes. In the future, consider using P90 or P95 operators to handle outliers more reliably. | Span Duration Parent Span ID |
| HTTP Errors | Too many HTTP request errors | This trigger notifies us if there are any 400 or 500 level HTTP status requests | HTTP Status Code Parent Span ID |
| General Errors | Too many errors | This trigger notifies us if there are errors | Error |