Before you Begin
Before you change your pricing plan, make sure you have:- A Honeycomb account. If you don’t have an account yet, sign up for a Free plan:
- Team Owner role. Only Team Owners can change billing settings and update plans.
Compare Available Plans
Honeycomb offers multiple plan levels to fit different team sizes and needs:- Free: Get started with core observability features at no cost.
- Pro: Access flexible event volume tiers and advanced features.
- Enterprise: Customize a solution for large-scale deployments.
Change Your Plan
To complete this task, you must be a Team Owner.
- Select Account (your avatar) from the navigation menu, then choose Team Settings.
-
On the Team Settings page, select the Billing view.
The Billing view shows your current plan and billing information.

- Select Update Plan.
-
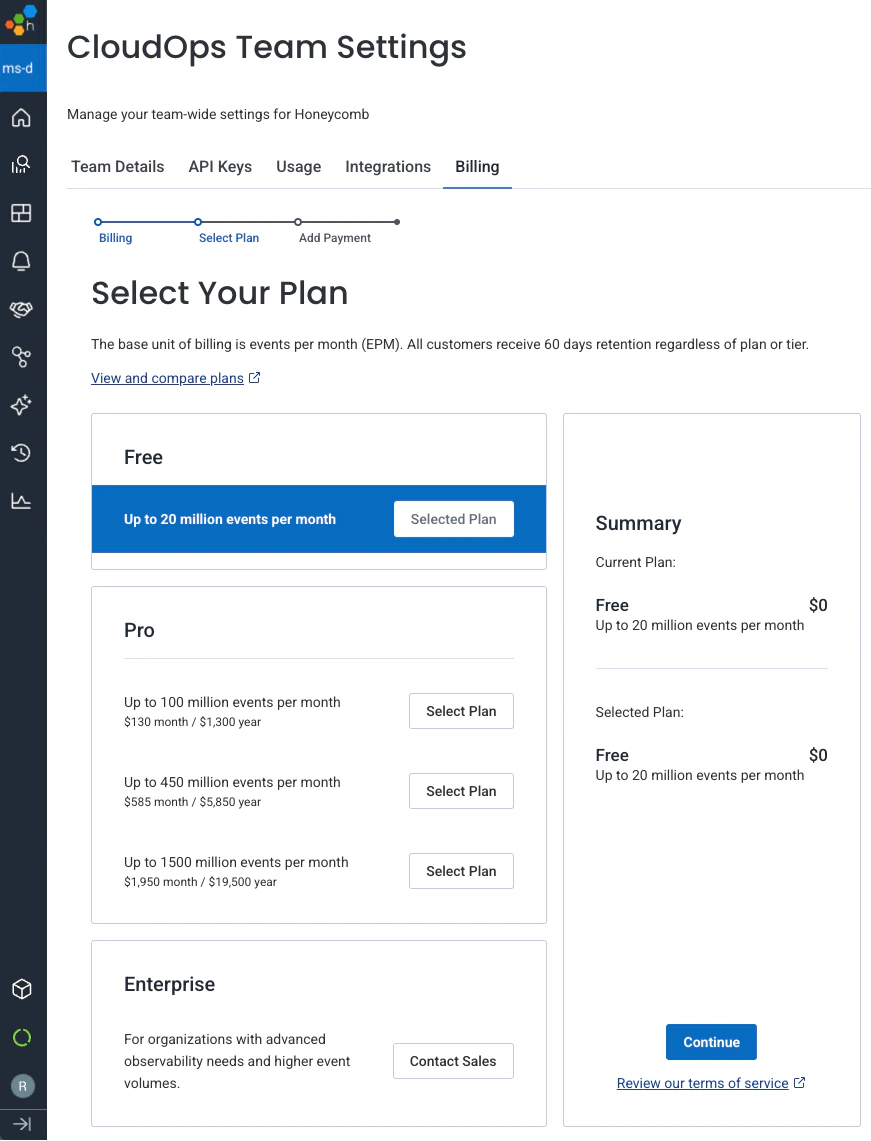
On the Select Your Plan page, review the available plans and select Select Plan next to your preferred option.
- Select Add Payment to continue to the payment details page.
-
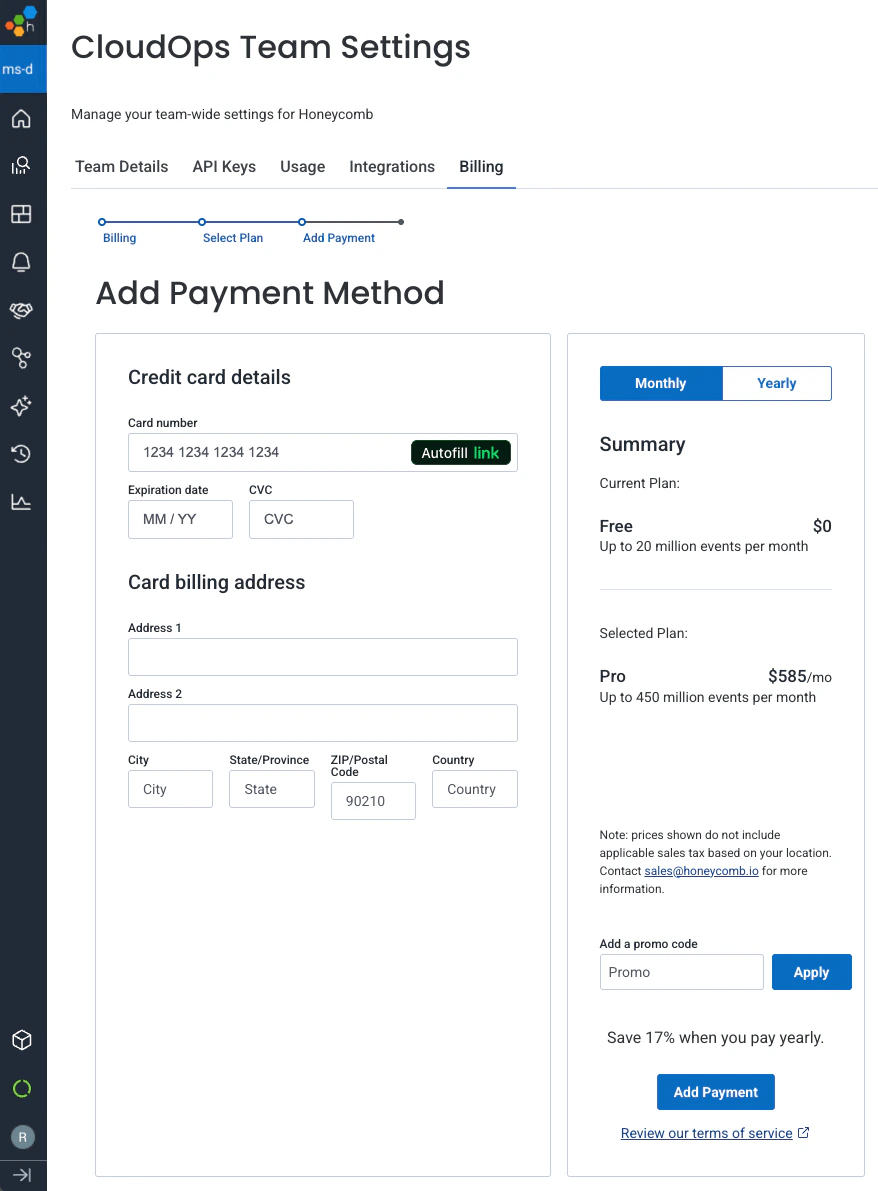
Enter your payment information:
- Credit card number, expiration date, and security code
- Billing address associated with your credit card
- Promo code (if you have one)
-
Choose your billing cycle:
- Monthly: Pay each month.
- Yearly: Pay annually (typically includes a discount).
- Review the Terms of Service, then select Add Payment.
-
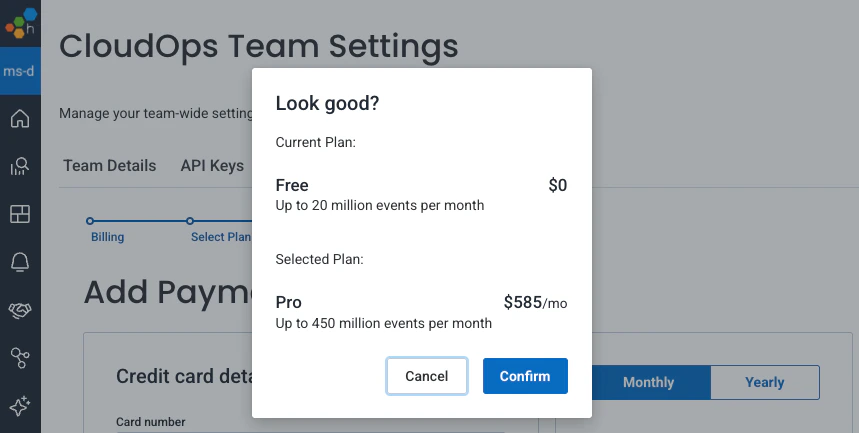
In the confirmation modal, review both your current plan and selected plan details, then select Confirm.