

What are Environment-level API Keys?
In Honeycomb, some API keys are associated with Honeycomb Environments, which organize all of your Honeycomb resources and consist of a set of datasets, a set of API keys, a set of calculated fields, and a set of markers. When you create an API key, you assign it a set of permissions, which determines which actions your Team can use it to perform in the associated Environment. Any programmatic request sent to Honeycomb must use an API Key.Uses
Honeycomb uses two types of Environment-level API keys, each for different purposes:- Ingest Keys: You can use these API Keys to send telemetry data to Honeycomb.
- Configuration Keys: You can use these API Keys to manage resources in your Honeycomb Environment.
Find API Keys
When you join Honeycomb, we help you create your first Team and Environment. As part of this process, we create your first Environment-level API Key—a Configuration Key—for you. To find your API Keys:- Log in to the Honeycomb UI.
- Select the Environments selector in the navigation menu, then select Manage Environments.
- In the list, locate the Environment for which you would like to find API Keys, and select its name to view the available settings.
- Select the API Keys view.
- Select the view that corresponds to the type of API Keys that you would like to view, either Ingest or Configuration.
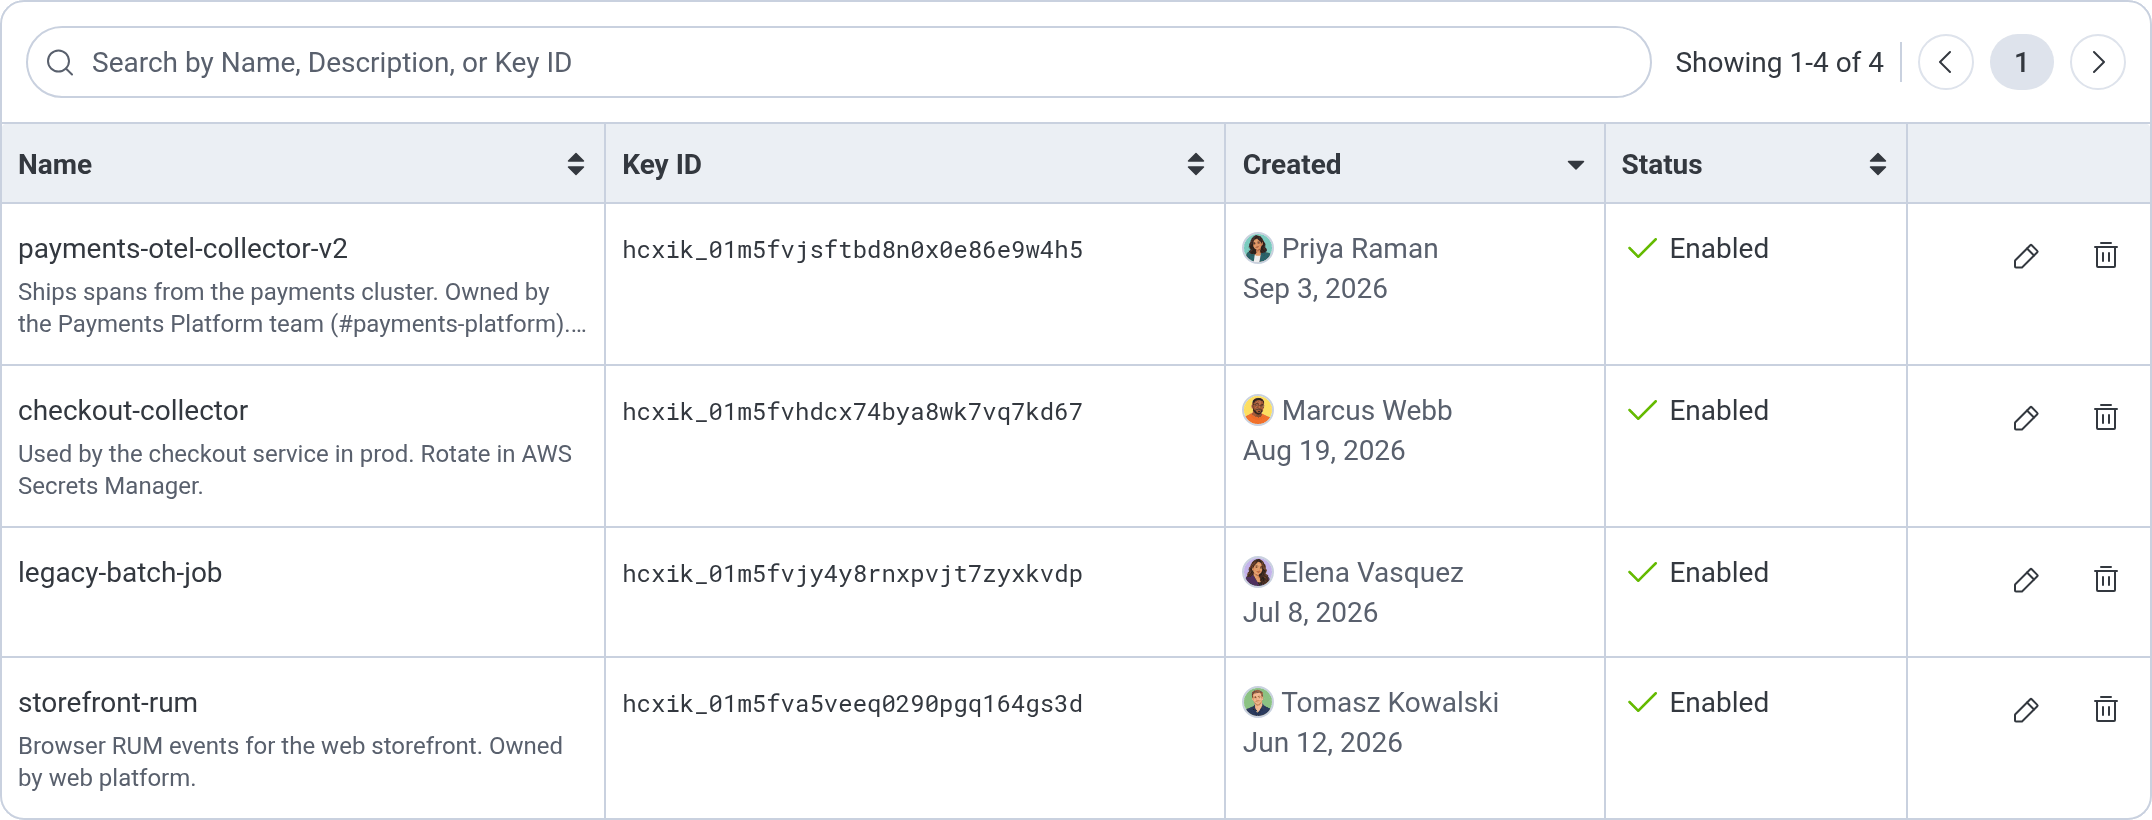
Create API Key
To create an API Key, you must be a Team Owner.
- Log in to the Honeycomb UI.
- Select the Environments selector in the navigation menu, then select Manage Environments.
- In the list, locate the Environment where you want to add an API Key, and select its name to view the available settings.
- Select the API Keys view.
- Select the view that corresponds to the type of API Key that you would like to create, either Ingest or Configuration.
- Select Create Ingest API Key or Create Configuration API Key.
-
In the dialog, enter the details for your API Key:
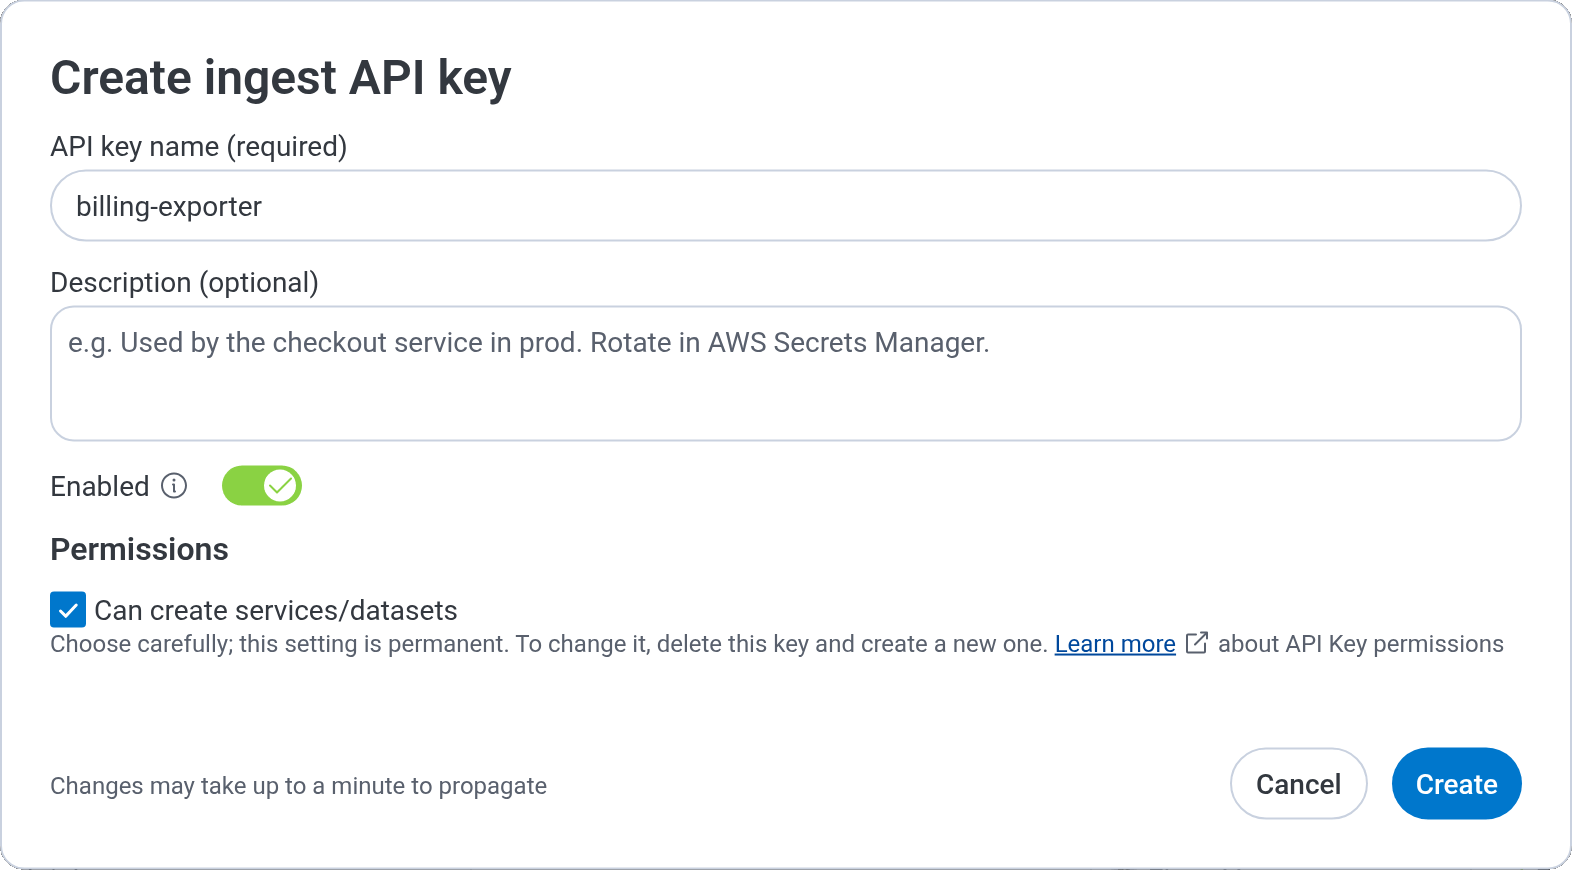
- Select Create.
- For Ingest Keys, copy your Key Secret and save it to a secure location, then select Done. Honeycomb returns it only upon creation, and you must copy or reveal it before you can select Done. Configuration Keys can be retrieved from the Honeycomb UI at any time.
Change API Key
To modify an API Key, you must be a Team Owner.
- Log in to the Honeycomb UI.
- Select the Environments label on the top-left, then select Manage Environments.
- In the list, locate the Environment that contains the API Key that you want to edit, and select its name to view the available settings.
- Select the API Keys view.
- Select the view that corresponds to the type of API Key that you would like to change, either Ingest or Configuration.
- In the list, locate the API Key that you want to change, and select its Edit (pencil) icon. For Configuration Keys, Honeycomb opens a read-only view of the key; select Edit to change it.
-
Change the API Key’s details as desired.
To learn more about the actions that you can assign to API Keys, visit the API Key permissions section.
To add, edit, or clear the key’s description, change the Description (optional) field.
To clear the description, delete all of its text.
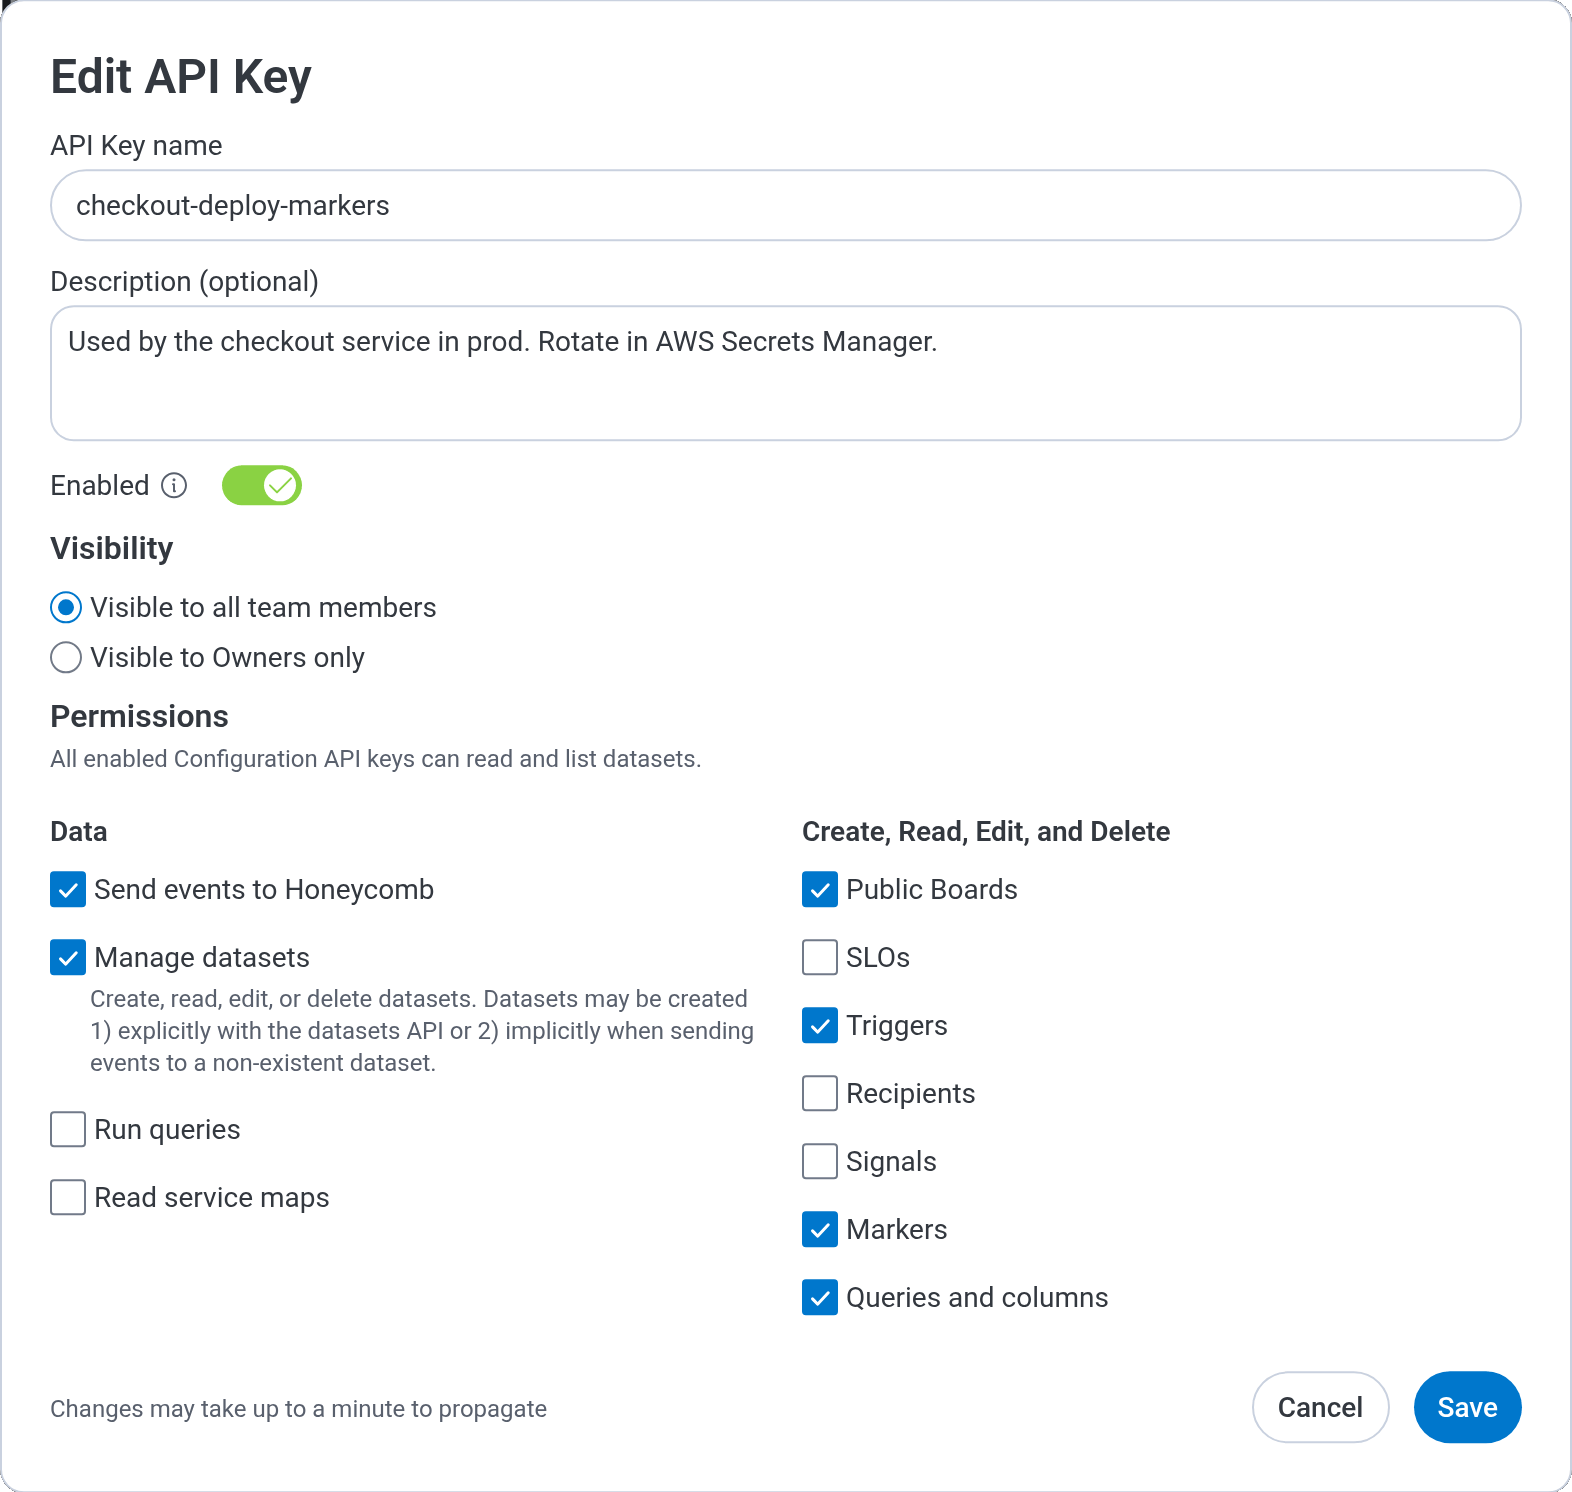
- Select Save.
Describe API Keys
A description is an optional note about a key, such as where it is used or how to rotate it. For example:Used by the checkout service in prod. Rotate in AWS Secrets Manager.
Descriptions help your team identify a key without searching code to find where it is used.
To learn how descriptions fit into key management, visit Best Practices for API Keys.
A description can contain up to 2,000 characters.
The Description (optional) field stops accepting input at that limit.
Only Team Owners can add, edit, or clear descriptions.
Team members who are not Team Owners can read a key’s description in the list.
They can also read it when they open an Ingest Key.
Only Team Owners can open a Configuration Key, so other team members see at most the first two lines of its description.
Manage Descriptions with the API
You can set a key’s description with the Key Management API for Ingest and Configuration Keys. Send thedescription attribute, a string of up to 2,000 characters, to the Create an API Key and Update an API Key endpoints.
- Responses from the Key Management API always include
description. The value is an empty string if the key has no description. - To keep a key’s description unchanged when you update the key, omit
descriptionor sendnull. - To clear a key’s description, send an empty string (
"").
Delete Ingest Keys
To delete your Ingest Key:- Log in to the Honeycomb UI.
- Select the Environments label on the top-left, then select Manage Environments.
- In the list, locate the Environment that contains the API Key that you want to delete, and select its name to view the available settings.
- Select the API Keys view.
- Select the Ingest view.
- In the list, locate the Ingest Key that you want to delete, and select its Delete (trash) icon.
- In the Delete Ingest API Key? dialog, type the name of the Ingest Key, which appears above the field.
- Select Delete.
Disable Configuration Keys
To disable a Configuration Key, you must be a Team Owner, and you must have at least one remaining Configuration Key in your Environment.
- Log in to the Honeycomb UI.
- Select the Environments label on the top-left, then select Manage Environments.
- In the list, locate the Environment that contains the API Key that you want to disable, and select its name to view the available settings.
- Select the API Keys view.
- Select the Configuration view.
- In the list, locate the Configuration Key that you want to disable, and select its Edit (pencil) icon, then select Edit.
- Turn off the Enabled toggle.
- Select Save.
Enable Configuration Keys
To enable a Configuration Key, you must be a Team Owner.
- Log in to the Honeycomb UI.
- Select the Environments label on the top-left, then select Manage Environments.
- In the list, locate the Environment that contains the API Key that you want to enable, and select its name to view the available settings.
- Select the API Keys view.
- Select the Configuration view.
- In the list, locate the Configuration Key that you want to enable, and select its Edit (pencil) icon, then select Edit.
- Turn on the Enabled toggle.
- Select Save.
API Key Permissions
Honeycomb uses two types of Environment-level API keys, each for different purposes:- Ingest Keys: Generally used to send telemetry data to Honeycomb.
- Configuration Keys: Generally used to manage resources in your Honeycomb Environment.
Ingest Keys
Ingest Keys are Environment-level API Keys that you can use to send telemetry data to Honeycomb. Ingest Keys have a single permission available, Can create services/datasets, which controls whether they can implicitly create datasets. If an event is sent to Honeycomb specifying a non-existent dataset, Honeycomb will create a new dataset if the associated Ingest Key can implicitly create datasets.You cannot change permissions assigned to an Ingest Key after you have created the key.
You can delete the Ingest Key.