

This feature is available as part of the Honeycomb Pro and Enterprise plans.
In this guide, we demonstrate a SAML Identity Provider configuration using Microsoft Entra ID.
If you are using a different SAML Identity Provider, field names and locations may vary, so you will need to locate the corresponding fields in your Identity Provider’s user interface.
Before You Begin
To successfully complete this guide, you should have an active Microsoft Entra account.Enable SSO in Honeycomb
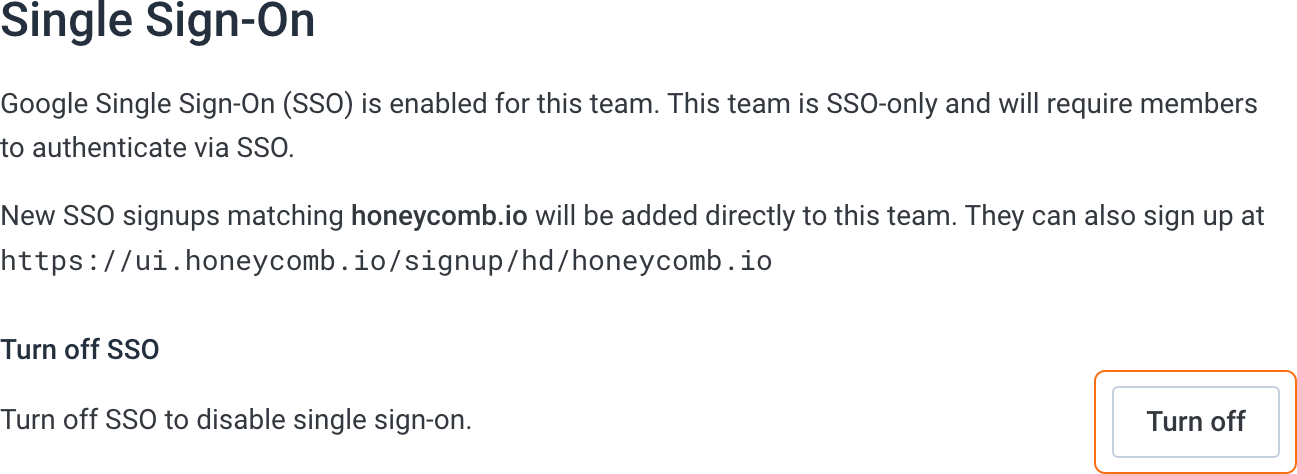
To begin, enable SSO in Honeycomb, which will allow you to get Honeycomb’s Service Provider settings:- In Honeycomb, navigate to Account > Team Settings, and select the Team Details view.
- Locate the Single Sign-On section, which displays any previous SSO configuration.
-
If your team is already configured to use Google SSO, turn off Google SSO.
-
Select Enable SSO.

- In the SSO provider configuration modal, select SAML/Okta, then select Next.
-
Locate the settings required by your Identity Provider. Information you will need includes:
- Service Provider Issuer
- Service Provider ACS URL
- Service Provider Certificate (optional, used when your Identity Provider requires encrypted SAML assertions or signed authentication requests)
 Honeycomb generates a unique identifier based on your team name. You will see the identifier appended to the values in the Service Provider Issuer and Service Provider ACS URL fields. For this example, the team name is
Crewbacca, so the team’s generated identifier iscrewbacca.
Configure Your Identity Provider
Next, configure your Identity Provider to work with Honeycomb. To do this, you must set up SSO for an application integration in your Identity Provider, and then specify which users should be able to use SSO to log in to your team in Honeycomb. When you configure your Identity Provider, you must provide exact configuration values for your SAML attributes.In this section, we demonstrate a typical SAML Identity Provider configuration using Microsoft Entra ID.
If you are using a different SAML Identity Provider, field names and locations may vary, so you will need to locate the corresponding fields in your Identity Provider’s user interface.
Set Up SSO
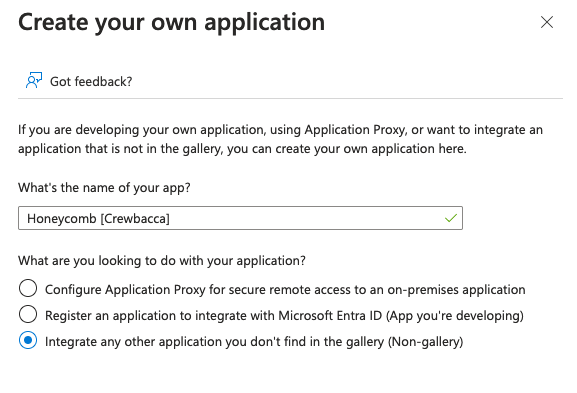
Set up SSO in your Identity Provider using the Service Provider settings you retrieved from Honeycomb:- Open a new browser tab, and go to your Microsoft Entra admin center.
- In Microsoft Entra, go to Dashboard > Enterprise Applications > Overview.
- Select + New application and a Browse Microsoft Entra Gallery display appears.
- Select Create your own application.
-
When prompted, name your app in the format “Honeycomb [Your Team Name]” and select the Integrate any other applications you don’t find in the gallery (Non-gallery) radio option.
- Assign yourself access to the new Honeycomb enterprise application. Your user account must be assigned to the Honeycomb application in order to finish configuration. You may assign other users to the application now, or you can wait and add more users later.
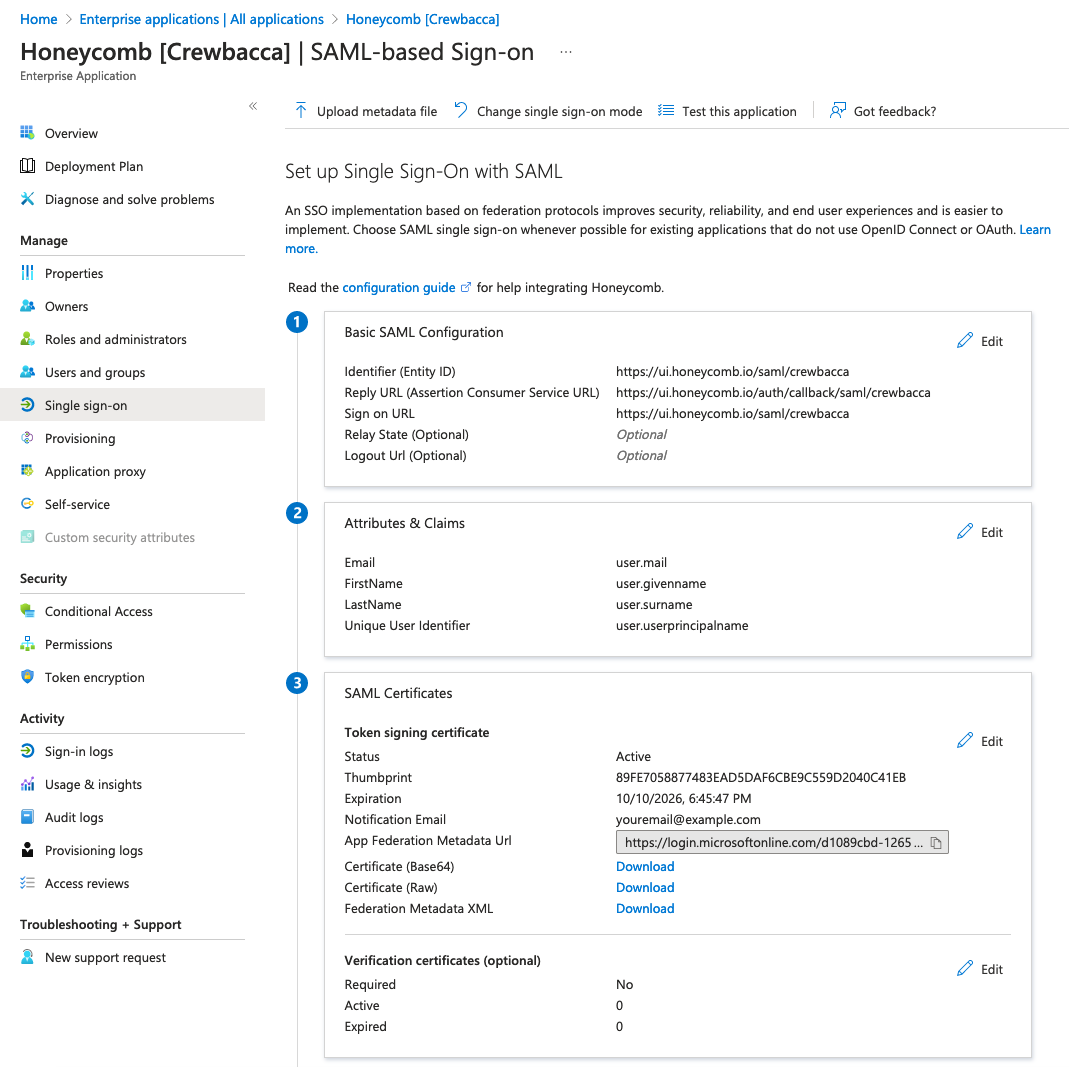
- Select SAML as the single sign-on method.
-
For Set up Single Sign-On with SAML, locate the Basic SAML Configuration section, and enter your retrieved Honeycomb setting values according to the following mapping:
Microsoft Entra ID Field Honeycomb Setting Name Identifier (Entity ID) Service Provider Issuer/Entity ID Reply URL (Assertion Consumer Service URL) Service Provider ACS URL Sign on URL The honeycomb.iobase domain from the URLs above plus the path/login/sso/{team_slug}. See tip below. -
Locate the Attribute & Claims section, and add the following values:
The values for SAML attributes must be the exact values we provide below. For example, for the
Emailattribute, enteruser.mail—not the actual email address of the user.All attributes should have no namespace. Leave advanced SAML claims options as their defaults:Attribute Name Value Emailuser.mailFirstNameuser.givennameLastNameuser.surnameUnique User Identifieruser.userprincipalnameAdvanced SAML Claims Option Value Include attribute name formatDisabledIssuer with application IDDisabledAudience overridenone
Configure Honeycomb
Finally, configure SSO in Honeycomb using the Identity Provider settings you retrieved from your Identity Provider. Microsoft Entra provides a metadata URL, which allows Honeycomb to fetch the settings it needs and update them automatically. To automatically configure SSO in Honeycomb:- Switch to the browser tab that contains your Honeycomb Service Provider settings.
- In Microsoft Entra, locate App Federation Metadata Url under the SAML Certificates section and copy it.
- In Honeycomb, paste the App Federation Metadata Url you copied from your Identity Provider into Identity Provider Metadata URL.
- Select Convert to SAML SSO Team.