> ## Documentation Index
> Fetch the complete documentation index at: https://docs.honeycomb.io/llms.txt
> Use this file to discover all available pages before exploring further.
# Change Pricing Plan
> Upgrade, downgrade, or switch your Honeycomb pricing plan at any time to match your team's event volume and feature requirements.
Choose the plan that fits your team's needs.
Update your Honeycomb pricing plan at any time.
Upgrade to access higher event volume and advanced features, switch between paid plans, or downgrade to a different plan level as your requirements change.
## Before you Begin
Before you change your pricing plan, make sure you have:
* **A Honeycomb account.**
If you don't have an account yet, sign up for a Free plan:
* [Create a US account](https://ui.honeycomb.io/signup)
* [Create an EU account](https://ui.eu1.honeycomb.io/signup)
Your account region determines where Honeycomb stores your data. Choose US-based or EU-based storage based on your data residency requirements.
* **Team Owner role.**
Only Team Owners can change billing settings and update plans.
## Compare Available Plans
Honeycomb offers multiple plan levels to fit different team sizes and needs:
* **Free:** Get started with core observability features at no cost.
* **Pro:** Access flexible event volume tiers and advanced features.
* **Enterprise:** Customize a solution for large-scale deployments.
For detailed feature comparisons and pricing information, visit [Honeycomb Pricing Plans](https://www.honeycomb.io/pricing).
## Change Your Plan
To complete this task, you must be a [Team Owner](/configure/teams/manage-permissions/).
To change your Team's pricing plan:
1. Select **Account** (your avatar) from the navigation menu, then choose **Team Settings**.
2. On the **Team Settings** page, select the **Billing** view.
The **Billing** view shows your current plan and billing information.
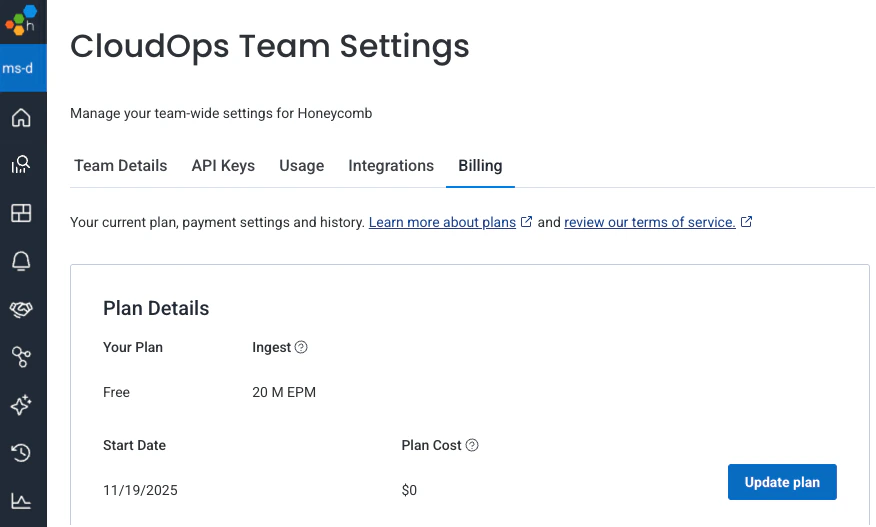 3. Select **Update Plan**.
4. On the **Select Your Plan** page, review the available plans and select **Select Plan** next to your preferred option.
3. Select **Update Plan**.
4. On the **Select Your Plan** page, review the available plans and select **Select Plan** next to your preferred option.
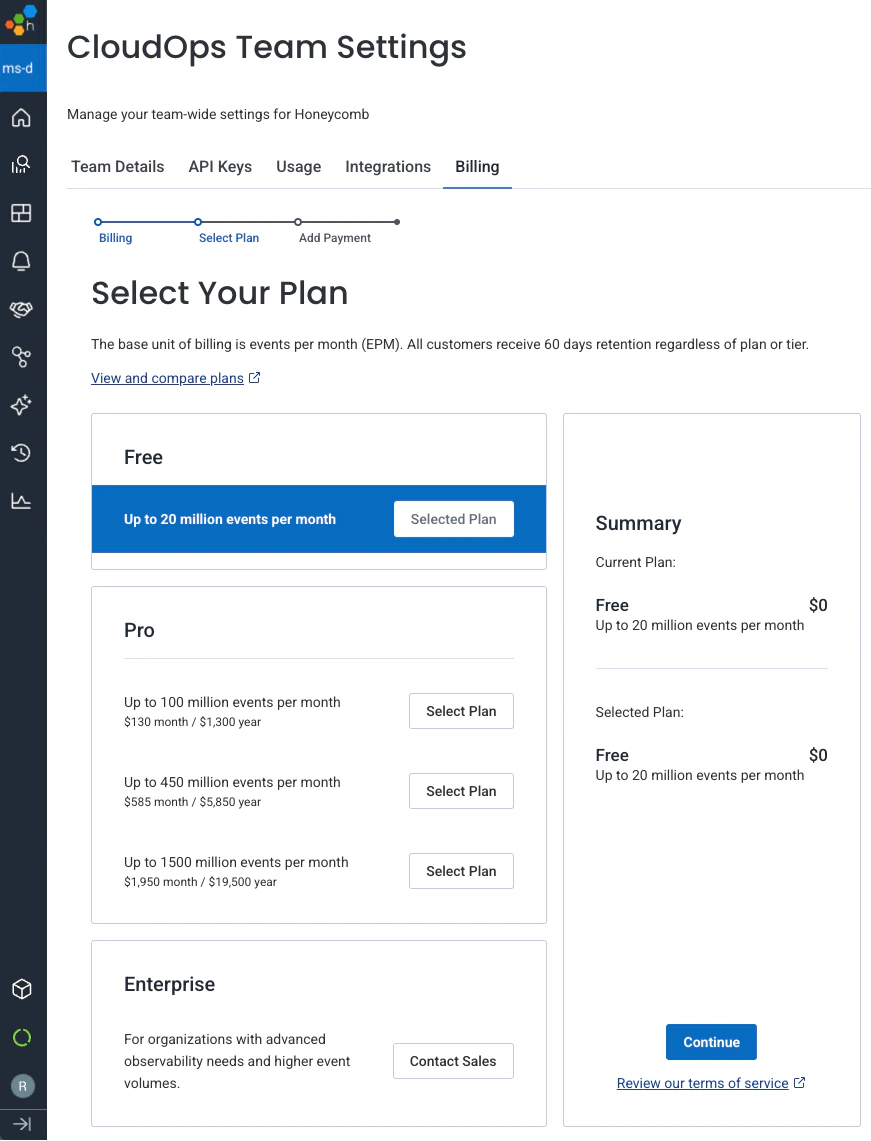 Enterprise plans offer custom configurations and pricing.
To explore Enterprise options, select **Contact Sales**.
5. Select **Add Payment** to continue to the payment details page.
6. Enter your payment information:
* Credit card number, expiration date, and security code
* Billing address associated with your credit card
* Promo code (if you have one)
Enterprise plans offer custom configurations and pricing.
To explore Enterprise options, select **Contact Sales**.
5. Select **Add Payment** to continue to the payment details page.
6. Enter your payment information:
* Credit card number, expiration date, and security code
* Billing address associated with your credit card
* Promo code (if you have one)
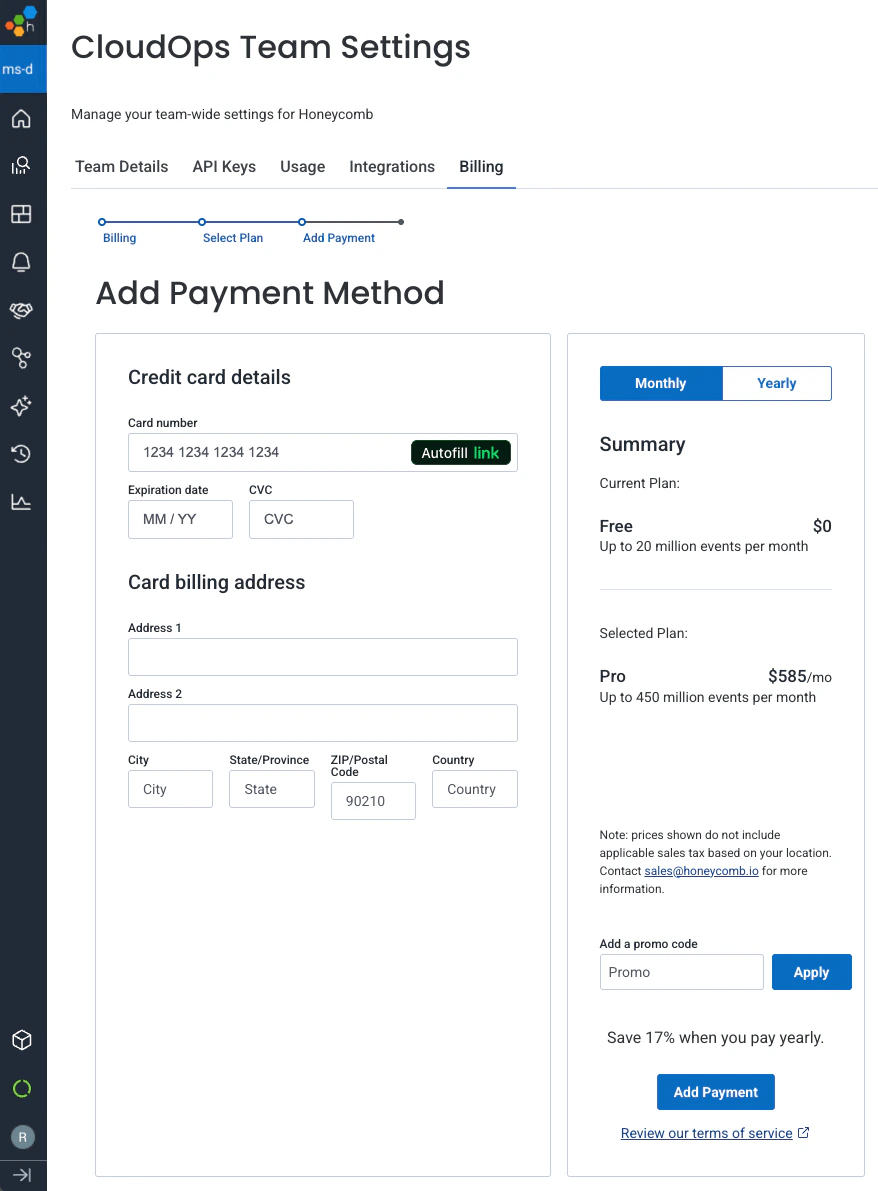 7. Choose your billing cycle:
* **Monthly:** Pay each month.
* **Yearly:** Pay annually (typically includes a discount).
8. Review the Terms of Service, then select **Add Payment**.
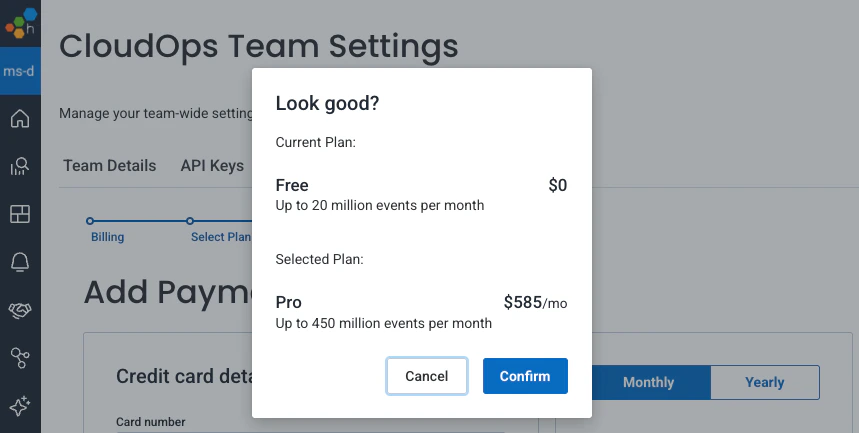
9. In the confirmation modal, review both your current plan and selected plan details, then select **Confirm**.
7. Choose your billing cycle:
* **Monthly:** Pay each month.
* **Yearly:** Pay annually (typically includes a discount).
8. Review the Terms of Service, then select **Add Payment**.
9. In the confirmation modal, review both your current plan and selected plan details, then select **Confirm**.
 After you confirm, Honeycomb returns you to the **Billing** view.
Your new plan appears immediately, and your billing history updates with the purchase date and status.
After you confirm, Honeycomb returns you to the **Billing** view.
Your new plan appears immediately, and your billing history updates with the purchase date and status.