> ## Documentation Index
> Fetch the complete documentation index at: https://docs.honeycomb.io/llms.txt
> Use this file to discover all available pages before exploring further.
# Manage Dataset Calculated Fields
> Create, update, and delete calculated fields scoped to a specific dataset to simplify queries and apply consistent logic to your telemetry data.
For clearer insights and consistency, you can use calculated fields to create new fields by applying functions and logic to existing data.
## What is a Dataset Calculated Field?
In Honeycomb, saved calculated fields can apply to either a specific dataset or an entire environment.
Dataset-specific calculated fields allow you to define custom computations that apply only within a single dataset.
By managing these fields at the dataset level, you transform raw data into more meaningful insights without affecting other datasets in your environment.
For a more general introduction to calculated fields, their scopes, and how you can use them in Honeycomb, visit [Use Calculated Fields](/investigate/query/build/calculated-fields/).
## Creating Calculated Fields
Define a calculated field to transform or derive new insights from your data.
To create a dataset-specific calculated field:
1. Log in to the Honeycomb UI.
2. In the navigation menu, select the **Environment** label, then choose the environment that includes the dataset to which you want to add a calculated field.
3. In the navigation menu, select **Manage Data**, then choose **Datasets**.
4. Locate the dataset to which you want to add a calculated field, and select its name to open its settings.
5. Go to the **Schema** view.
6. Expand the **Calculated Fields** section.
7. Select **Add New Calculated Field**.
8. In the modal, enter details:
| Field | Description |
| ----------------- | ----------------------------------------------------------------------------------------------------------------------------------------------------------------------------------------------------------------------------------------------------------------------------------------------------------------------------------------------------------------------------- |
| **Display Name** | Name that appears in the Query Builder. Enter a name that is unique across the dataset and its containing environment. Although Honeycomb tries to prevent duplicate field names, they can still occur. For help resolving naming conflicts, visit [Common Issues with Queries: Calculated Fields](/troubleshoot/common-issues/queries/#a-link-points-to-the-wrong-location). |
| **Prompt** (beta) | Use natural language to generate a Calculated Field. For example, `return "slow" if $duration_ms > 1000`. Be sure to explicitly reference any schema fields using the $ syntax (for example, `$field\_name\`). For help resolving errors, visit [Common Issues with Queries: Calculated Fields](/troubleshoot/common-issues/queries/#calculated-fields). |
| Editor | Formula that defines your field. For syntax, available functions, and example formulas, visit [Calculated Field Formula Reference](/reference/calculated-field-expression/). |
Hover over syntax errors (red underlines or red triangles) for suggestions on how to fix them.
9. Select **Save**.
The screen refreshes, and your new field appears in the list.
## Editing Calculated Fields
Update a calculated field to refine its formula or adjust its name.
Before changing a calculated field, check for dependencies that may be affected, such as Boards, Triggers, and SLOs.
To edit a dataset-specific calculated field:
1. Log in to the Honeycomb UI.
2. In the navigation menu, select the **Environment** label, then choose the environment that includes the dataset with the calculated field you want to change.
3. In the navigation menu, select **Manage Data**, then choose **Datasets**.
4. Find the dataset that contains the calculated field you want to change, and select its name to open its settings.
5. Go to the **Schema** view.
6. Expand the **Calculated Fields** section.
7. Locate the calculated field in the list, and select **Edit**.
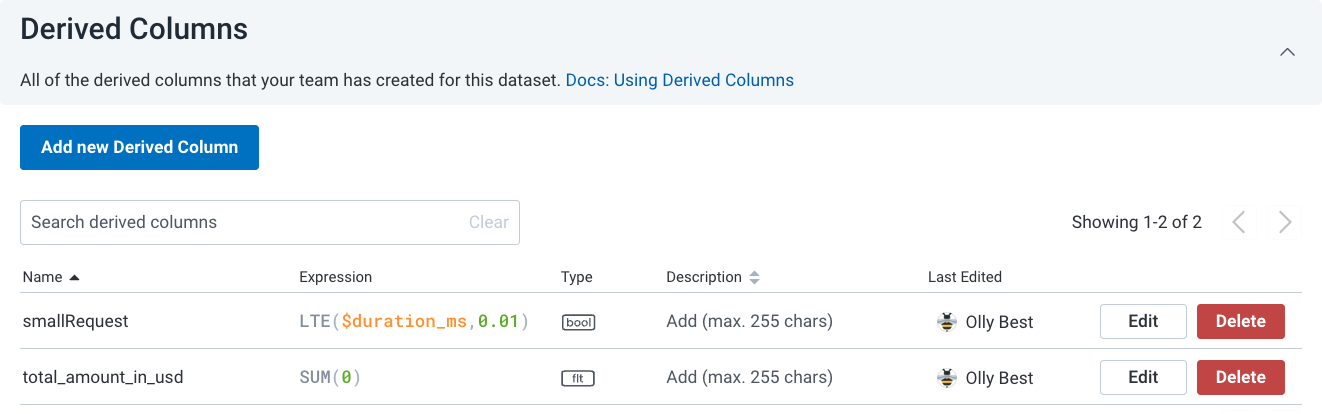 1. If dependencies exist, Honeycomb will prompt you to either [clone the field](#cloning-calculated-fields) or continue editing.
If you are unsure, contact the field's most recent editor before proceeding.
1. If dependencies exist, Honeycomb will prompt you to either [clone the field](#cloning-calculated-fields) or continue editing.
If you are unsure, contact the field's most recent editor before proceeding.
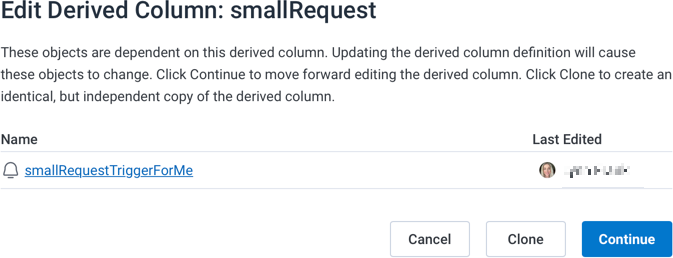 8. In the modal, modify the pre-populated name and formula as needed.
For syntax, available functions, and example formulas, visit [Calculated Field Formula Reference](/reference/calculated-field-expression/).
9. Select **Save**.
The screen refreshes, and the edited field updates in the list.
## Cloning Calculated Fields
If you need a new calculated field similar to an existing one, you can clone the existing calculated field and modify it as needed.
To clone a dataset-specific calculated field:
1. In the navigation menu, select the **Environment** label, then choose the environment that includes the dataset with the calculated field you want to clone.
2. In the navigation menu, select **Manage Data**, then choose **Datasets**.
3. Find the dataset that contains the calculated field you want to clone, and select its name to open its settings.
4. Go to the **Schema** view.
5. Expand the **Calculated Fields** section.
6. Locate the calculated field in the list, and select **Clone**.
8. In the modal, modify the pre-populated name and formula as needed.
For syntax, available functions, and example formulas, visit [Calculated Field Formula Reference](/reference/calculated-field-expression/).
9. Select **Save**.
The screen refreshes, and the edited field updates in the list.
## Cloning Calculated Fields
If you need a new calculated field similar to an existing one, you can clone the existing calculated field and modify it as needed.
To clone a dataset-specific calculated field:
1. In the navigation menu, select the **Environment** label, then choose the environment that includes the dataset with the calculated field you want to clone.
2. In the navigation menu, select **Manage Data**, then choose **Datasets**.
3. Find the dataset that contains the calculated field you want to clone, and select its name to open its settings.
4. Go to the **Schema** view.
5. Expand the **Calculated Fields** section.
6. Locate the calculated field in the list, and select **Clone**.
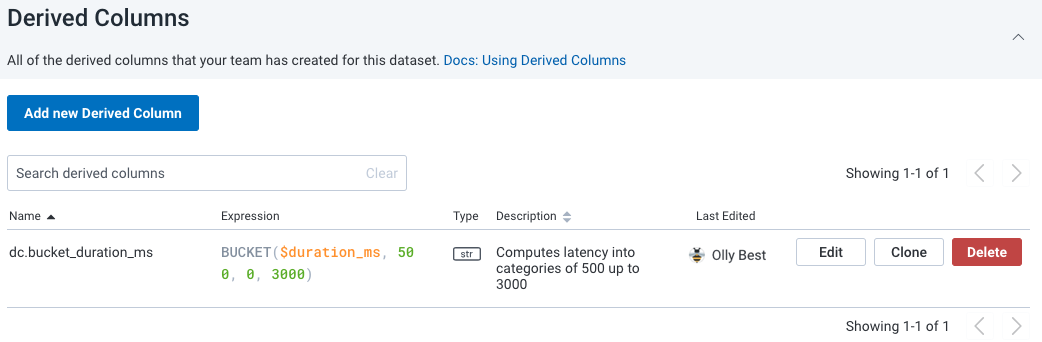 7. In the modal, modify the pre-populated name and formula as needed.
For syntax, available functions, and example formulas, visit [Calculated Field Formula Reference](/reference/calculated-field-expression/).
8. Select **Save**.
The screen refreshes, and your new field appears in the list.
## Deleting Calculated Fields
To manage your data effectively, you may need to delete calculated fields that you no longer need.
Before removing a calculated field, check for dependencies that may be affected, such as Boards, Triggers, and SLOs.
To delete a calculated field, you must be its creator or a [Team Owner](/configure/teams/manage-permissions/).
To delete a dataset-specific calculated field:
1. In the navigation menu, select the **Environment** label, then choose the environment that includes the dataset with the calculated field you want to delete.
2. In the navigation menu, select **Manage Data**, then choose **Datasets**.
3. Find the dataset that contains the calculated field you want to delete, and select its name to open its settings.
4. Go to the **Schema** view.
5. Expand the **Calculated Fields** section.
6. Locate the calculated field in the list, and select **Delete**.
7. In the modal, modify the pre-populated name and formula as needed.
For syntax, available functions, and example formulas, visit [Calculated Field Formula Reference](/reference/calculated-field-expression/).
8. Select **Save**.
The screen refreshes, and your new field appears in the list.
## Deleting Calculated Fields
To manage your data effectively, you may need to delete calculated fields that you no longer need.
Before removing a calculated field, check for dependencies that may be affected, such as Boards, Triggers, and SLOs.
To delete a calculated field, you must be its creator or a [Team Owner](/configure/teams/manage-permissions/).
To delete a dataset-specific calculated field:
1. In the navigation menu, select the **Environment** label, then choose the environment that includes the dataset with the calculated field you want to delete.
2. In the navigation menu, select **Manage Data**, then choose **Datasets**.
3. Find the dataset that contains the calculated field you want to delete, and select its name to open its settings.
4. Go to the **Schema** view.
5. Expand the **Calculated Fields** section.
6. Locate the calculated field in the list, and select **Delete**.
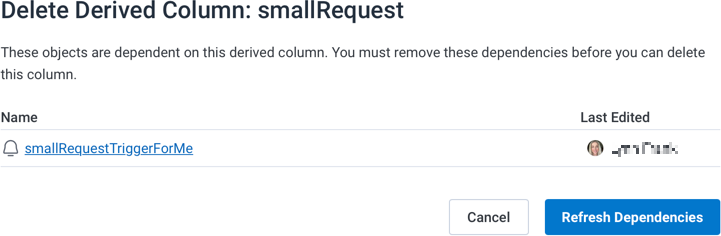
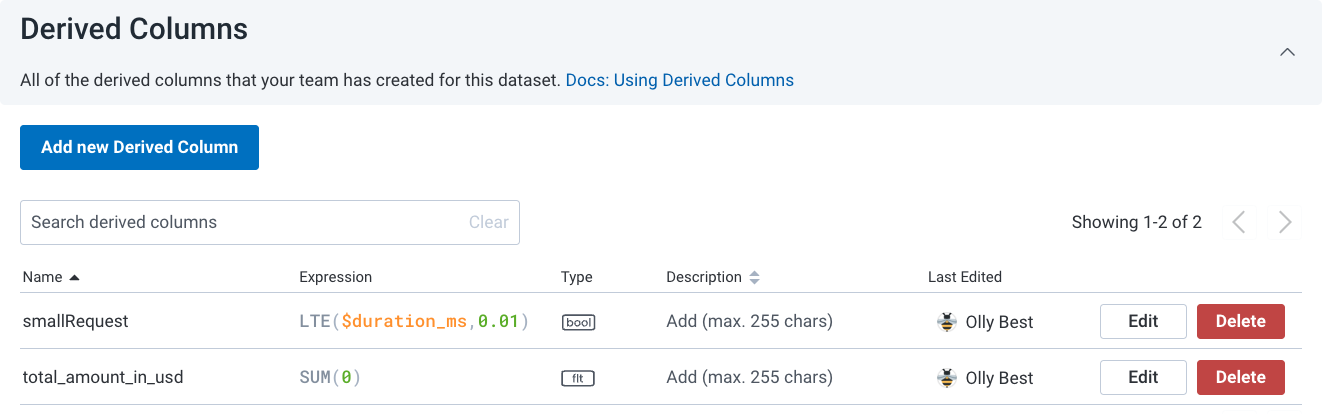 1. If dependencies exist, a list will appear.
2. To continue, remove all dependencies.
If you are unsure, contact the most recent editor of each dependency before proceeding.
3. Select **Refresh Dependencies**.
1. If dependencies exist, a list will appear.
2. To continue, remove all dependencies.
If you are unsure, contact the most recent editor of each dependency before proceeding.
3. Select **Refresh Dependencies**.
 7. In the confirmation modal, select **Delete**.
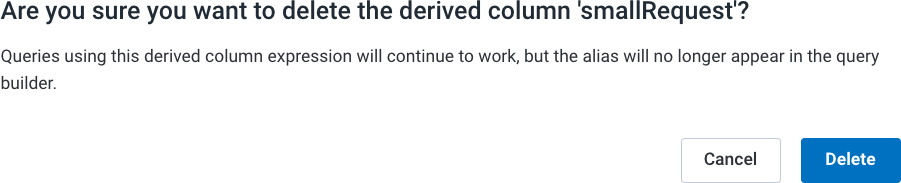 The screen refreshes, and the field no longer appears in the list.
Existing queries using the calculated field will still work, but the field name will no longer be available when building new queries.
The screen refreshes, and the field no longer appears in the list.
Existing queries using the calculated field will still work, but the field name will no longer be available when building new queries.